You have the option of adding transcripts for both narration and audio snippets on your iPoster. First you need to upload a narration or an audio snippet file. You will always be able to add a transcript manually. You may have the option to generate the transcript automatically using an integrated AI component – this option isn’t available on all conferences.
In either case once there is text in the transcript editing box a ‘Transcript’ button will appear on the preview version of your poster. Visitors can then click on this button to read the transcript.
This instruction is broken into two parts:
Part 1: Manually generate a narration or audio snippet transcript
Part 2: Auto generate a narration or audio snippet transcript
Please Note:
You will need to have uploaded an audio file to your poster to be able to follow the below instructions. See the FAQ on adding audio narration to your iPoster if you haven’t done this already.
Part 1: Manually generate a narration or audio snippet transcript
For Narration:
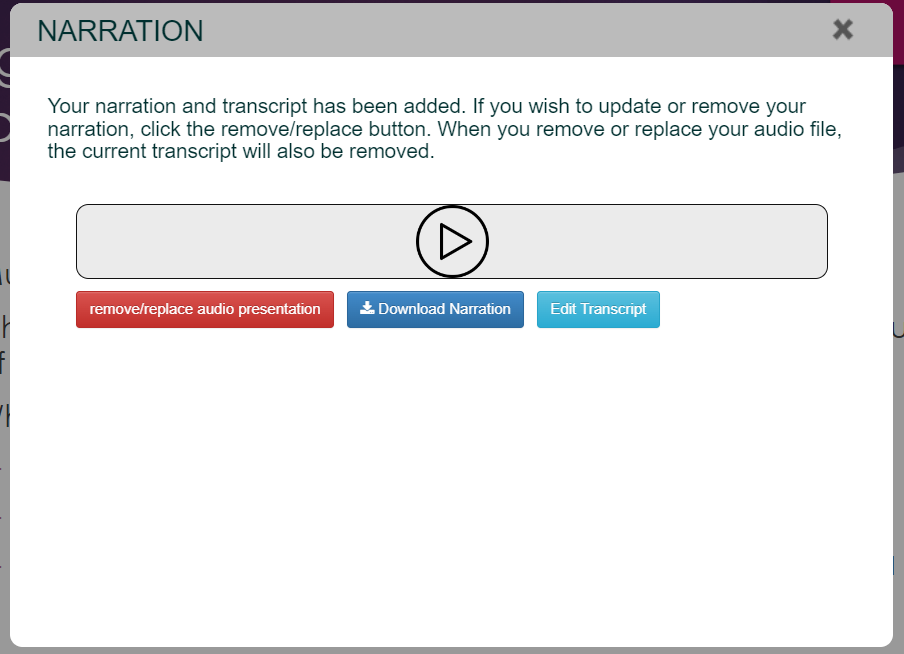
1. Click on the Narration button in the Main Menu. Click on the Enter Transcript button under your uploaded recording.
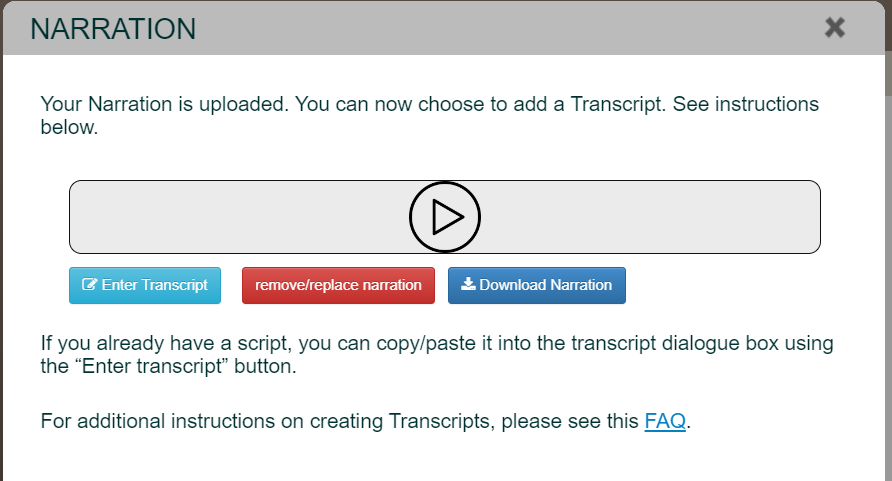
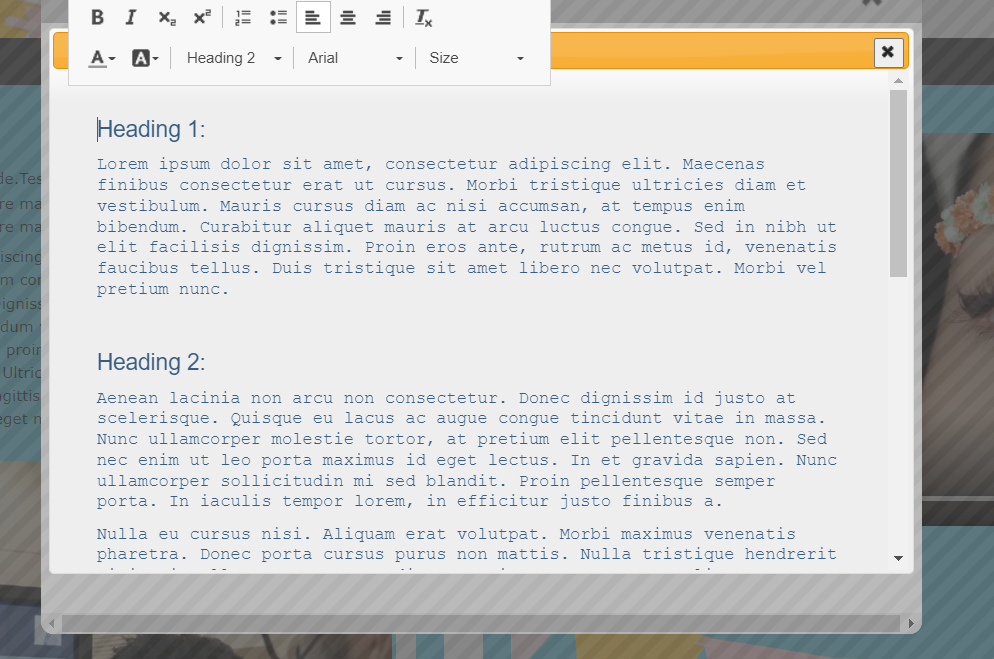
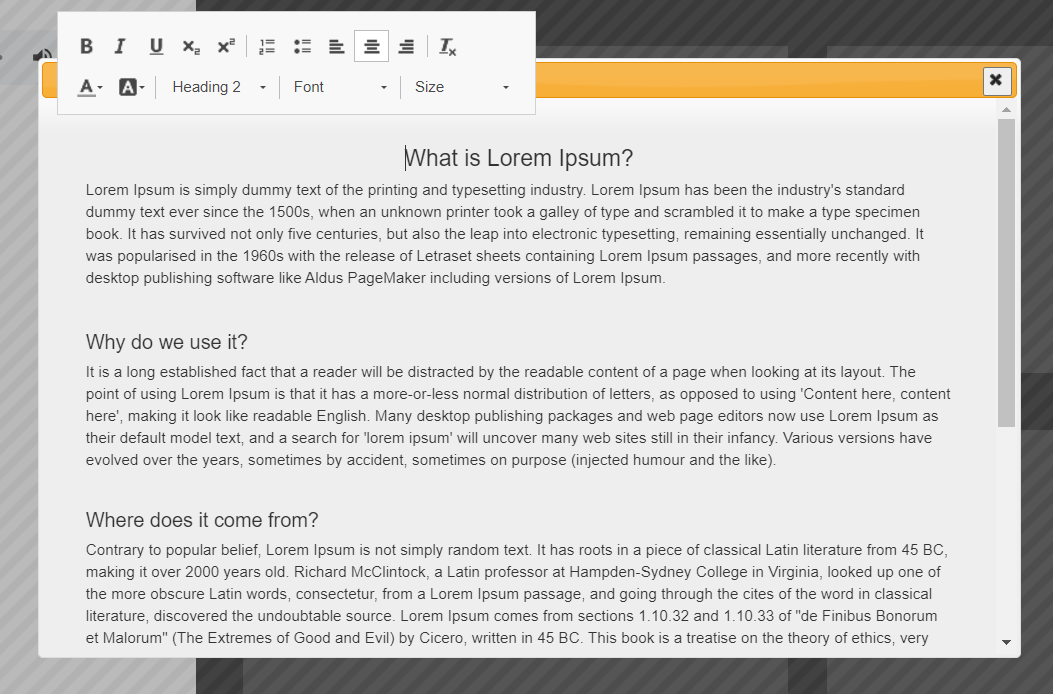
2. An empty content box will pop up. Add your narration transcript in here. You can either copy/paste it from another source, or you can type it in directly. You can then format the text as you like afterwards.
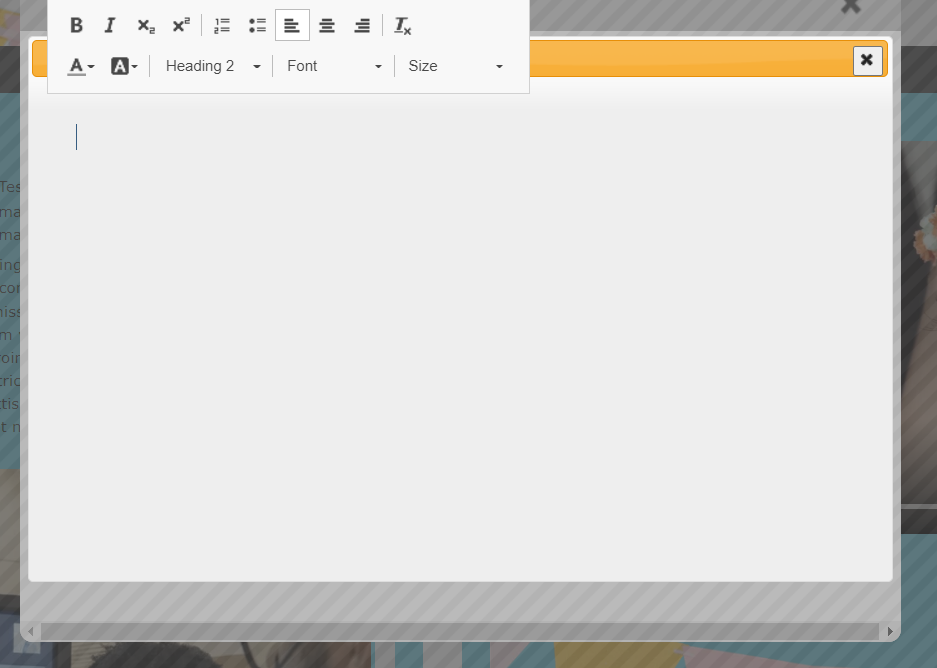
3. Edit your transcript text as required using the tools in the tool bar. i.e. add headings, change the font style/size, change the text color etc…
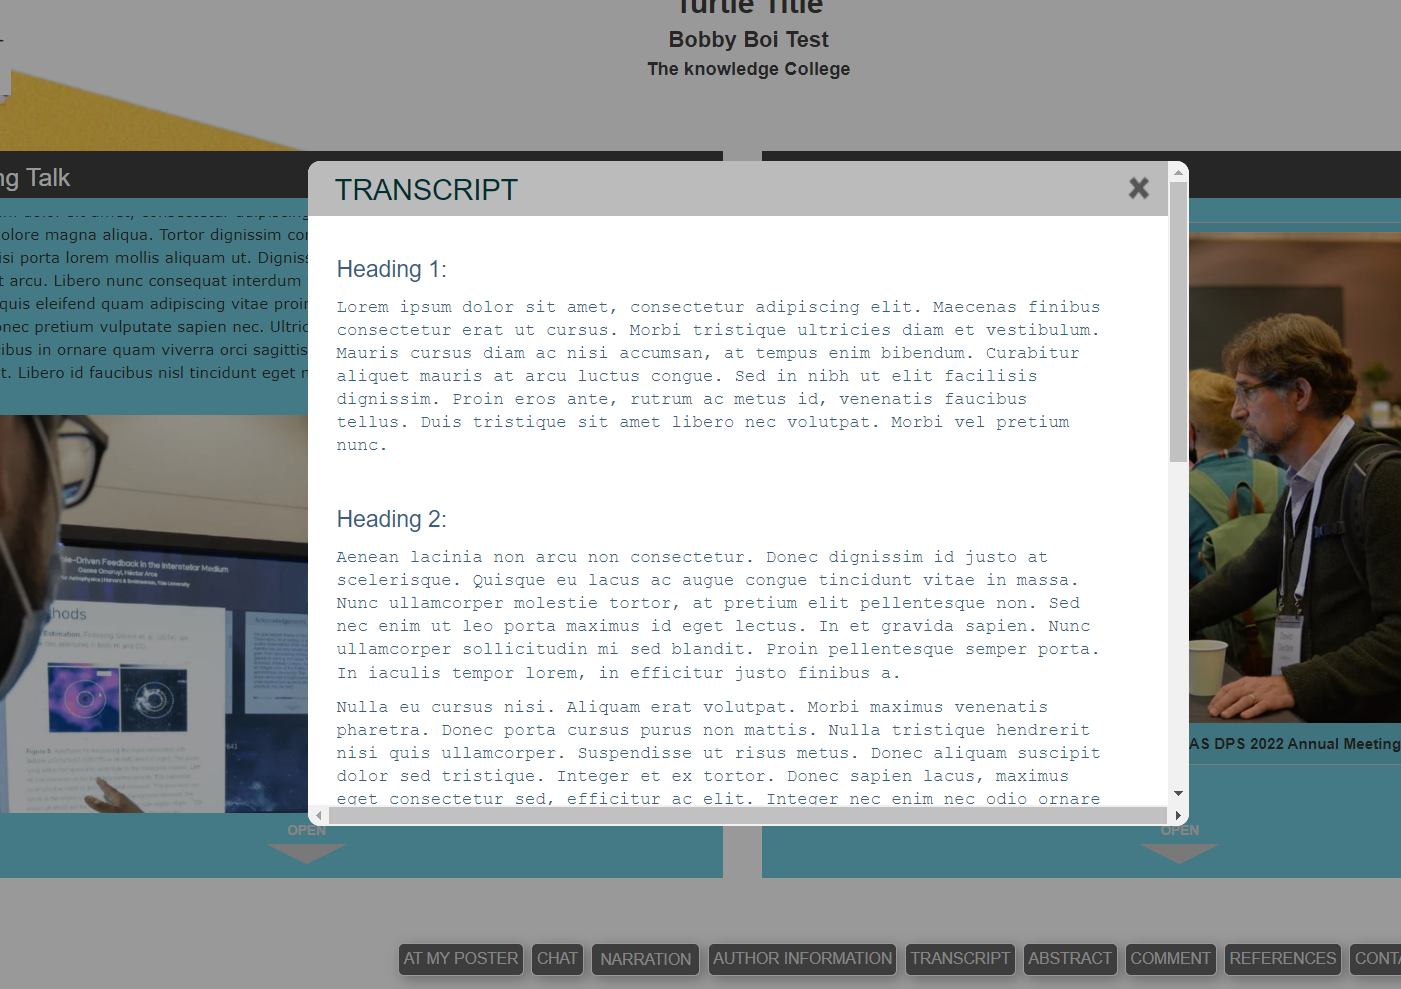
4. Click on Preview to check that the Transcript button has appeared at the bottom of your poster. Click on this button to view the transcript as visitors would.

For audio snippet:
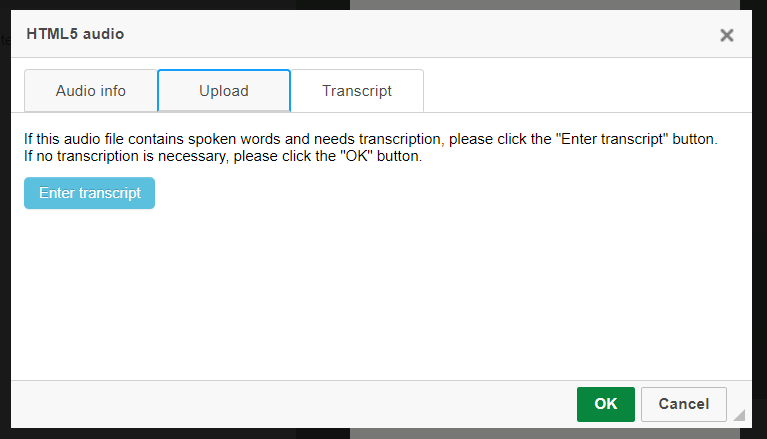
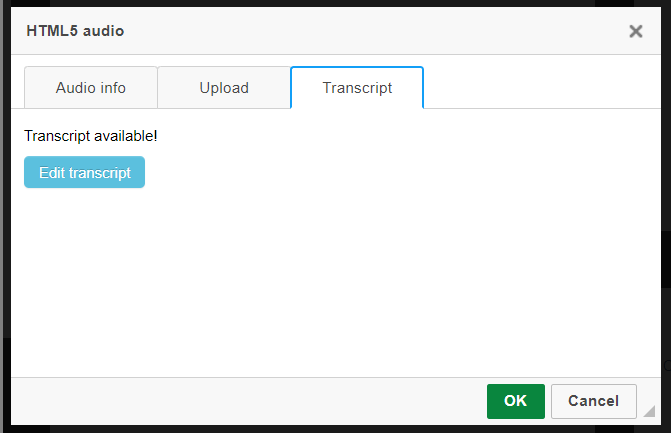
1. After you have uploaded an audio snippet file in a content box you will see a tab called ‘transcript’. Click on this tab to enter a transcript. This tool functions in exactly the same way as the Narration transcript for editing purposes (outlined in steps 2-3 above).
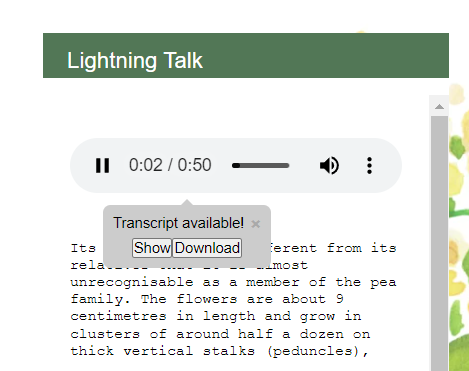
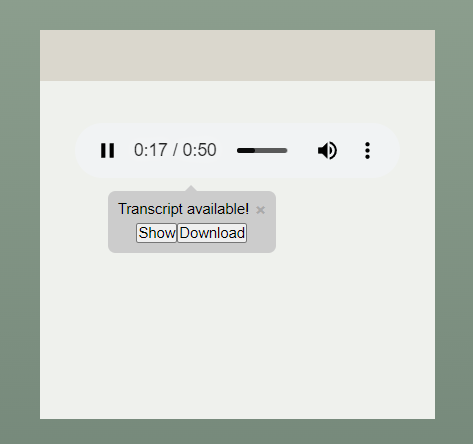
2. To check on your audio snippet transcript click on Preview and click the play button on the snippet. A pop-up will show advising that there is a transcript available. Click on ‘Show’ to view the transcript or ‘Download’ to download it.
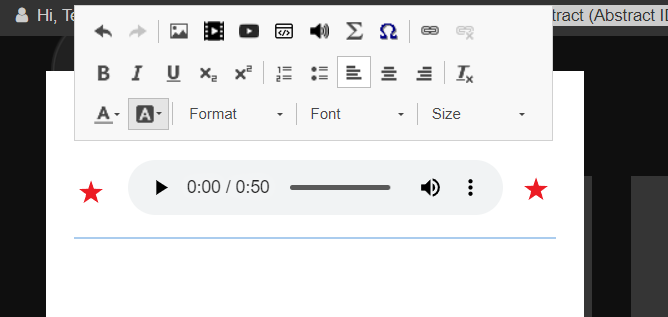
3. To edit your audio snippet transcript go to the editor screen and expand the content box. Double click to the left or right of the audio snippet section as shown by the red stars below. This will open up the transcript dialogue box.
4. Click on ‘Edit transcript’ button then edit your transcript as required.
5. Click on the X in the top right corner to close the dialogue box down.
Part 2: Auto generate a narration or audio snippet transcript
For narration:
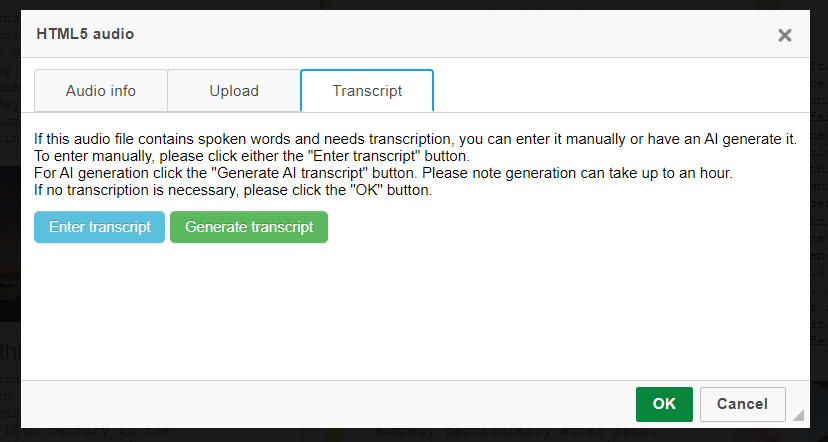
1. Click on the Narration button in the Main Menu. If your conference allows for auto generation of the transcript you will see a ‘Generate AI Transcript’ button as well as an Enter Transcript button.
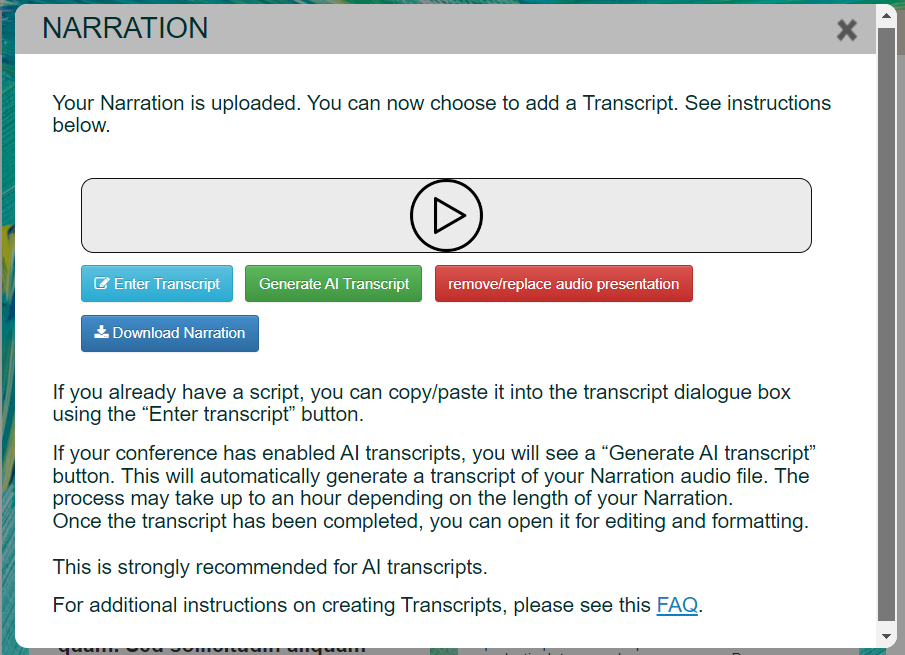
2. Click on the Generate AI Transcript button. You must now wait for the transcript to generate. This usually doesn’t take more than 30 mins However it may more or less time depending on the size/length of the recording.
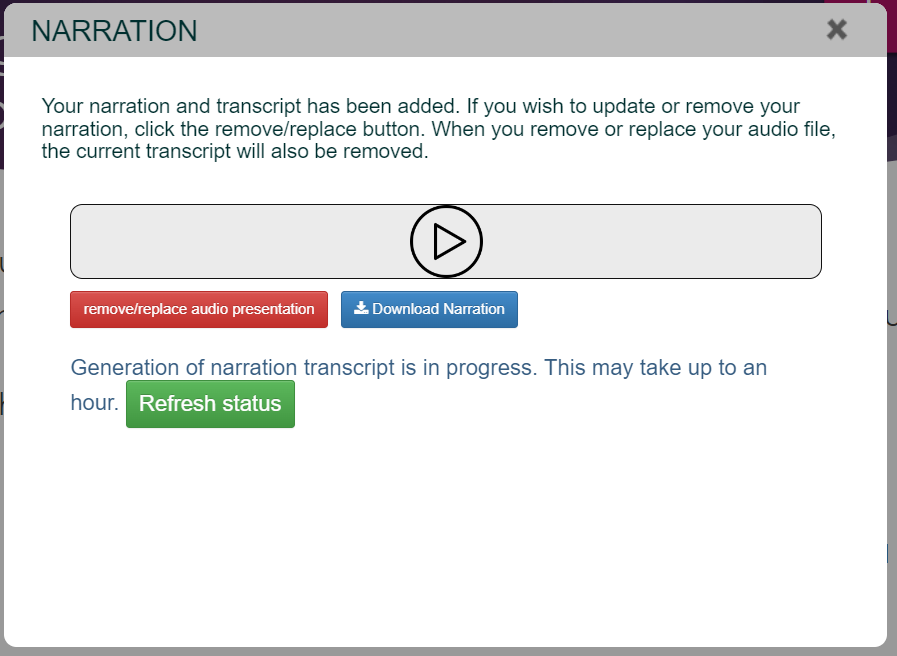
3. You can use the ‘Refresh Status button to check if your transcript has finished generating. If your transcript still hasn’t finished generating after an hour or so. Please contact support desk.
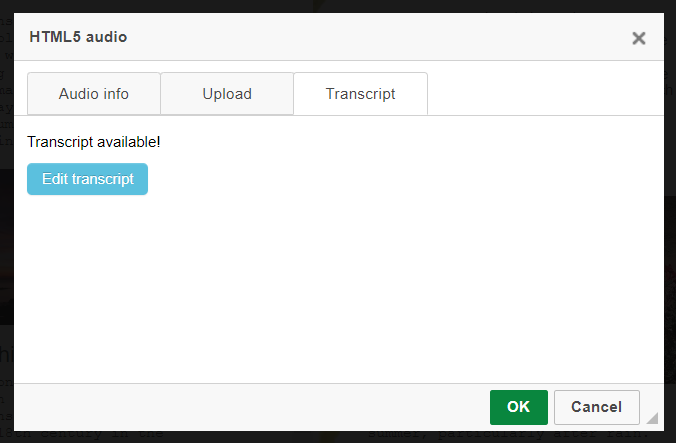
If the transcript is ready you will see a button called Edit Transcript. You can click on this at any point to edit the text in your transcript. The AI may have made mistakes with some words and it is always a good idea to check this. You can also format the text as required here. i.e. add paragraphs, or change the color of the text etc…
4. After editing your text, click on ‘Preview’ and check that the Transcript button has appeared at the bottom of your poster. Make sure your transcript is displayed as edited.
For audio snippet:
1. After you have uploaded an audio snippet file in a content box you will see a tab called ‘transcript’. Click on this tab then click on ‘Generate transcript’.
2. You must now wait for the transcript to generate. The time it takes will depend on how long the recording is and how big the file is. In this example my recording was 50 seconds and it took less than 5 minutes to until the transcript was ready. You can check if the transcript has finished generating by clicking on the refresh status button.

3. When the transcript is done the following screen will be shown. Click on ‘Edit transcript’ to make any adjustments to the text.
4. To check on your audio snippet transcript click on ‘Preview’ and click the play button on the snippet. A pop-up will show advising that there is a transcript available. Click on ‘Show’ to view the transcript or ‘Download’ to download it.