There are two ways to use an audio file in your iPoster:
1. Narration: You can present an overview of your work or take visitors on a guided tour, by using the NARRATION button on your template’s Main Toolbar. Visitors will be able to explore your iPoster as they listen to your presentation.
2. Within a content box: You can explain specific aspects of your research and include interviews or other recordings by using the INSERT AUDIO button in each of the Content boxes.
Note: If you have already added a narration or an audio snippet to your iPoster and would like to include a transcript see the FAQ ‘How do I add a narration transcript to my iPoster?‘ for further information and instructions.
General tips for adding a narration:
Here are some general tips on how to best use the built-in recording and MP3 upload tools. Please keep in mind that your conference organizers may have provided more specific instructions on the length of any required narrations that may differ from the below.
– We recommend that overall audio narration be no longer than 6-8 mins at the most. The size limit for audio file uploads is 50MB. The quality as well as the length of an audio file will determine its size. If your file is too big please compress it – you can google many free online file compressors for this purpose. Here is one we have used before: https://www.freeconvert.com/mp3-compressor
– If you plan to record a narration longer than a few minutes please consider using the file upload option rather than recording straight into the system as you cannot edit a recording made directly into the system.
– please also consider using the file upload option if you need to share a narration with others. You can record your pieces separately, edit them as required outside of the system, then upload the complete file.
– The recommended internet speed for uploading audio files is 5mbps. Particularly if your file size large (over 20MB). If you are having trouble uploading a file that is under 50MB please send it to our support team and we can try to help you with this.
– When recording your audio file: You can use your mobile device or a more sophisticated system, but we recommend using a microphone. It’s a good idea to rehearse your readings before recording and review them after you’ve recorded! Are they clear and easy to understand?
– The iPoster System accepts several audio files types. Here is a list of them:
- mp3
- ogg
- aac
- m4a
- aiff
- webm
- mp4
If your file is in a different format to the ones listed above and the upload is not working, you can try to convert it to MP3. This is easy to do using one of the free on-line converters. Here is a simple one that we have tested previously: freeconvert.com
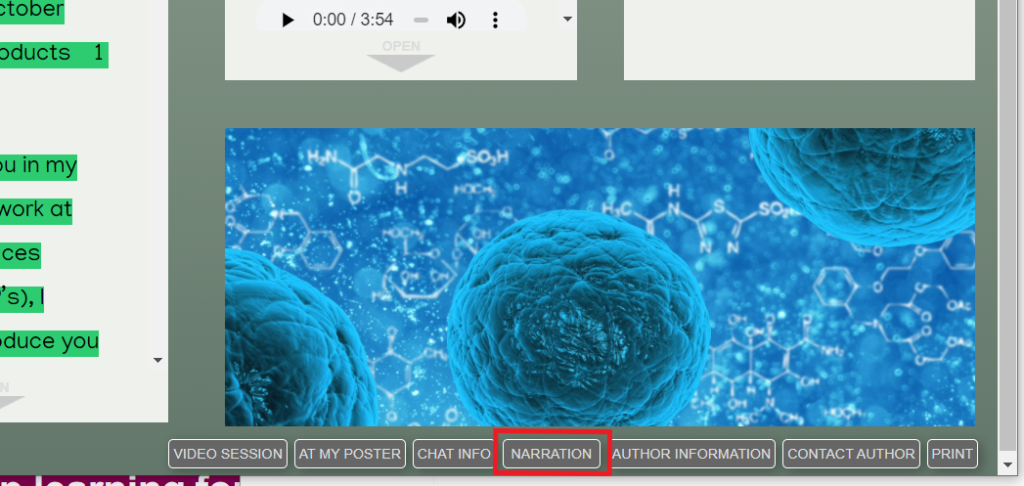
1. click on the NARRATION button on the Main Toolbar. An upload dialogue will open up.
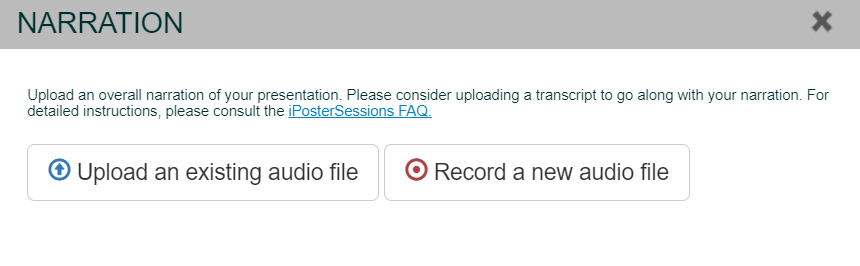
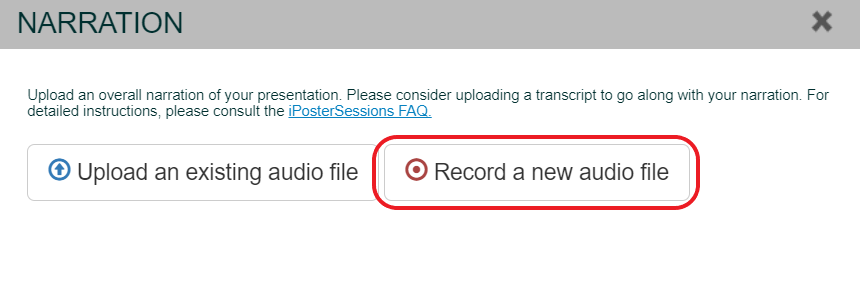
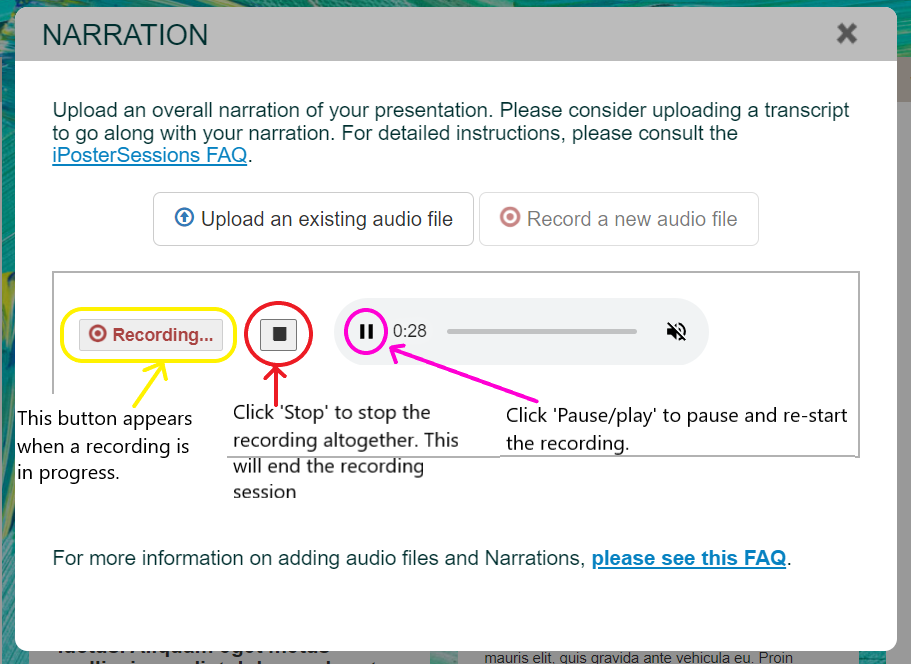
2. To record a new audio file directly from your computer: click on ‘Record a new audio file’. To pause the recording click on the pause button. You can then click play again to continue recording when you are ready. When you have finished recording click the ‘Stop’ button. Your recording will then be uploaded to your presentation.
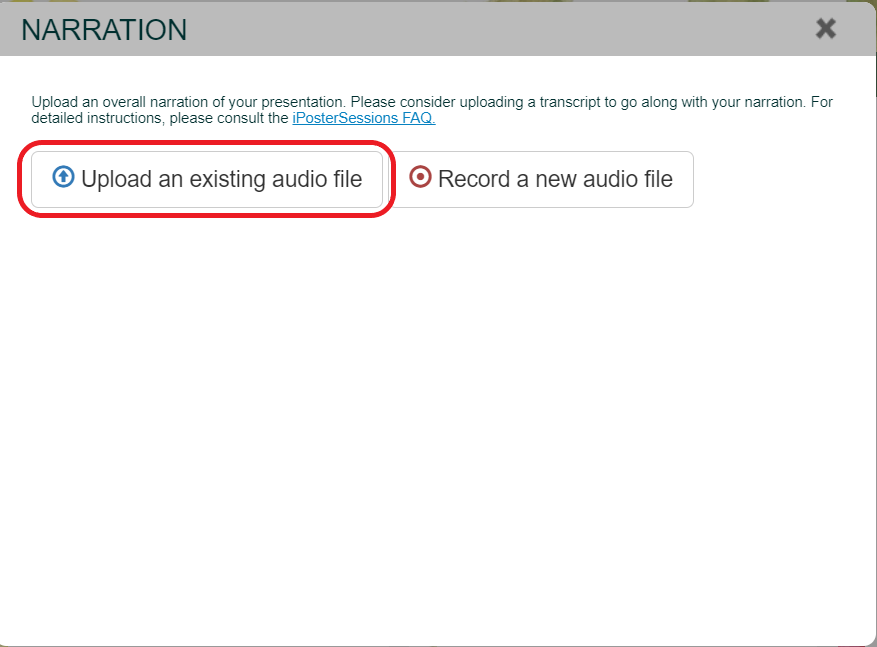
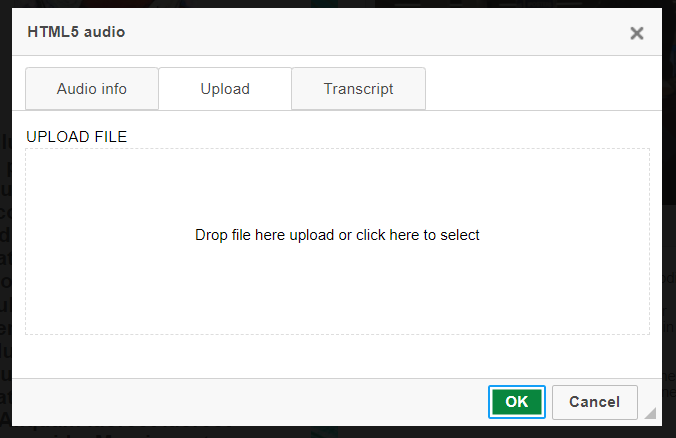
3. To Upload a pre-recorded file click on upload an existing audio file’. You can either browse your computer or drag and drop the audio file into the box.
4. Test your file in Preview. Click on the Preview button on the right hand menu. If you added a general audio presentation using the NARRATION button on the Main Toolbar, you will see that a button for NARRATION appears at the bottom of your iPoster.
5. Whether you have recorded a narration directly into the system or uploaded an audio file from your computer, the following screen will be shown once the recording is added. For detailed instructions on adding a transcript to your narration please see the FAQ on adding transcripts.
For adding audio files within content boxes
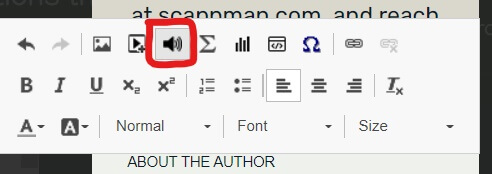
1. In the content box place your cursor in the position you want the audio file to display. Click on the INSERT AUDIO button in the formatting menu at the top of the Content Box.
2. An upload dialogue will open up. You can either browse your computer by clicking in the UPLOAD FILE box, or you can drag and drop the audio file into this box. Remember that audio snippets need to be under 50 MB in size and the bigger the file the longer it will take to upload.
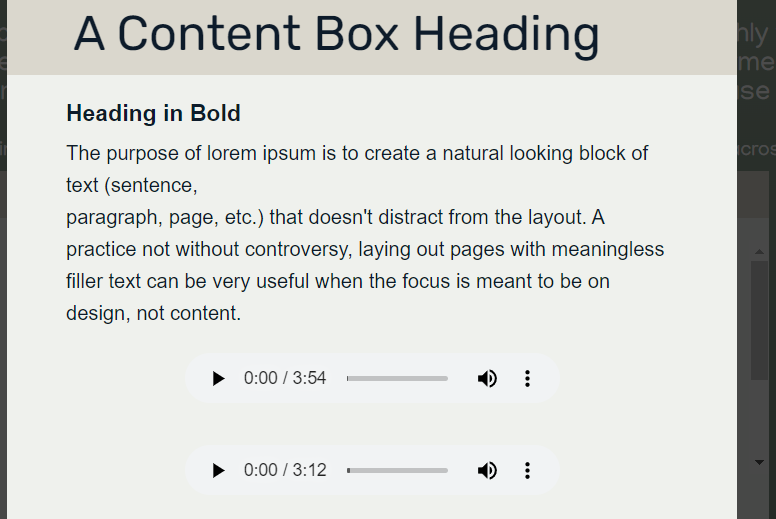
3. Once uploaded, check your file in Preview mode. Click on the Preview button on the right hand menu. Click on the play arrow in the content box.
4. For detailed instructions on adding a transcript to your audio snippet please see the FAQ on adding transcripts.
Need further assistance? Reach out to our support team by sending a support request. Don’t forget to let us know which conference you’re creating a presentation for.