You can copy/paste text into the iPoster content boxes using the right click method or the keyboard shortcuts ctrl +c/ ctrl +v. The system will not allow any preformatted or code rich data to be directly pasted into it. If you are copying from a code rich source – like a PDF, Word doc or another website – you will see a pop up box come up. You need to paste the text into this box then click OK. This will strip any foreign code and formatting from the text before pasting it into the content box.
See the below guide for screenshots outlining this process
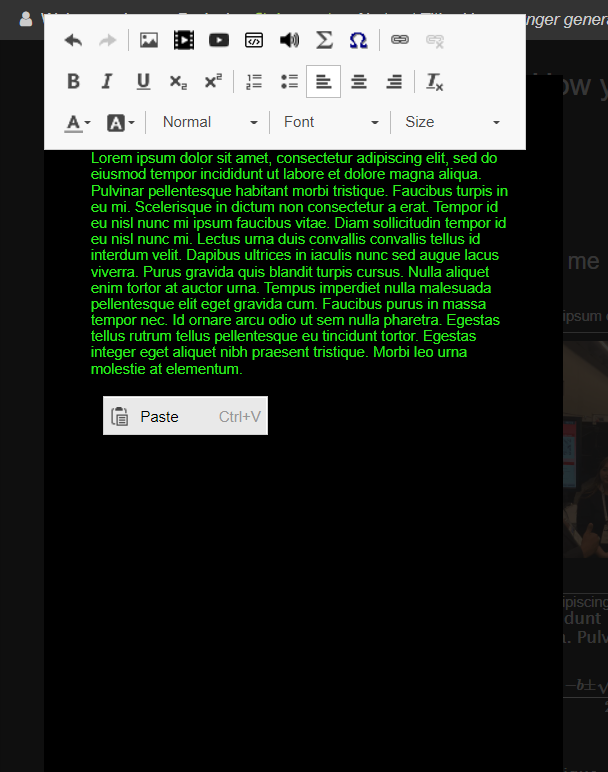
1. Copy the text that you want to add to your iPoster. Place the curser in the text box where you would like the pasted text to start and right click on the mouse. The following ‘paste’ button should appear:
2. Place the curser in the text box where you want to add the pasted text and right click on the mouse to select paste or use the keyboard shortcut: Ctrl + v.
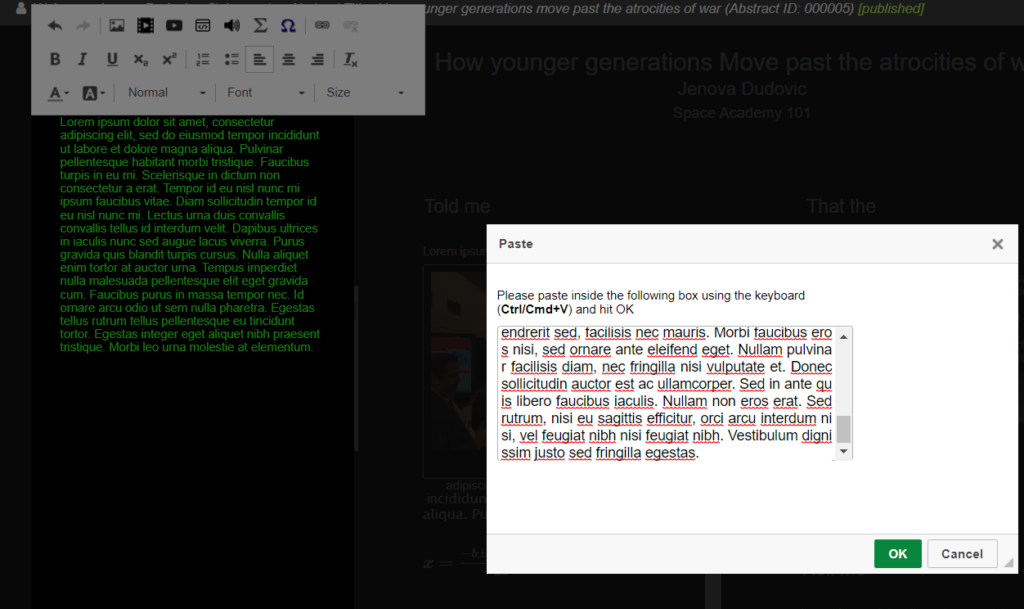
3. After clicking on ‘Paste’ or Ctrl + V, the following dialogue box will show up. Paste the copied text into this box. Click the ‘Ok’ button at the bottom of the pop up and your text should appear in the content box.
Need further assistance? Reach out to our support team by sending a support request. Don’t forget to let us know which conference you’re creating a presentation for.
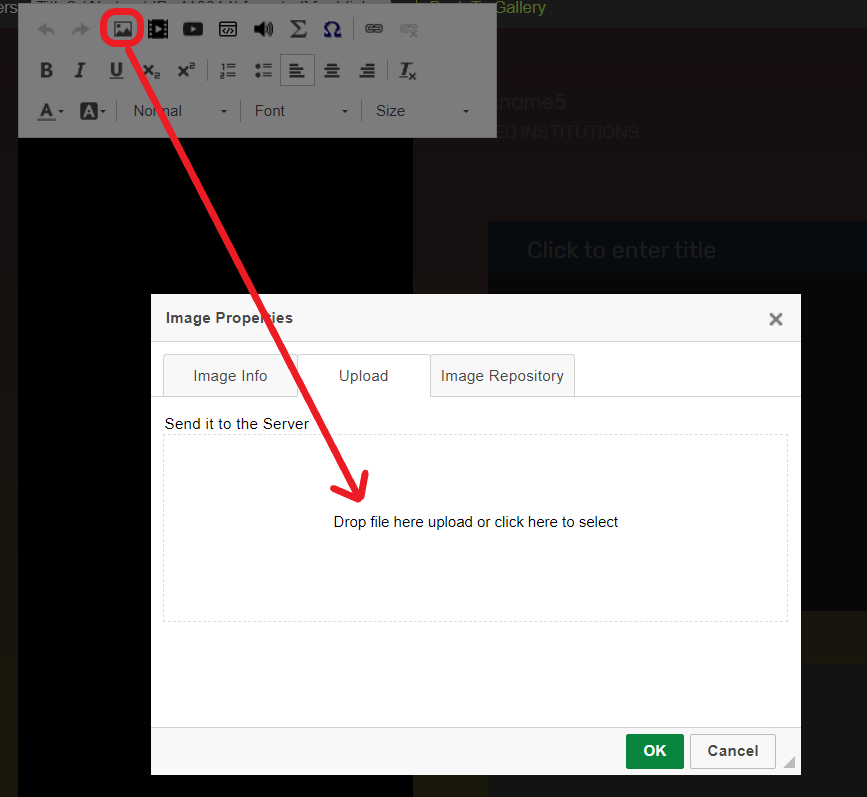
Add images to an iPoster in a couple of clicks using the Insert Image tool. You will find this tool on the toolbar of each content box as shown below.
General Image tips
The size of your images is important because it will impact the quality of your overall presentation. Ensure that your images are as large as possible so that they have maximum impact for the end viewer.
Images must be in JPG, PNG or GIF format. When inserting images, remember that they will expand to their full size when tapped or clicked on by visitors or by you during your presentation. So, make sure your images are as large as possible – up to 1920 x1080 pixels. And if available, use the original images for best quality. If they are not available, take screen shots of your images, but zoom in before you take them so that, again, they are as large as possible.
As you proceed, save your progress then check your work by clicking on the Preview button. You’ll get a close approximation of how your presentation will look on the HD screens, and can test all of the functionality: content boxes and images expand when clicked, videos play correctly, external links connect, etc…
Slideshow Images
The slide show window (available in some templates) has a minimum image size requirement of 960×360 pixels, but we recommend that you insert images up to 1920×1080 pixels.
When you look at the slide show in the condensed view any images larger than 960×360 will be cropped. However when you or an end viewer click or tap on the slide show in preview mode or at the conference, it will open up as an overlay and show all images at their full size.
Conference participants will then be able to flick through the slideshow as they wish. Having larger images will provide a more enjoyable and better quality viewing experience for them.
Diagrams, charts and tables
Diagrams, charts, tables, etc need to be inserted as images. Either export them from their source program as JPG or PNG, or take a screen shot. Make them as large as possible, and then import them into your content boxes. That way they will expand to make it easy for your visitors to view them.
Remember that an iPoster can contain so much more than an upload of a PDF or PowerPoint, so try to take advantage of this by including:
Videos
Sound files
Links to dynamic external information (e.g. online data sets, visualizations, etc…)
As much content as you feel is necessary to present your research with the detail it deserves. There are no content limits. As soon as you exceed the apparent physical space of a content box, it will scroll.
Adding an image to an iPoster content box
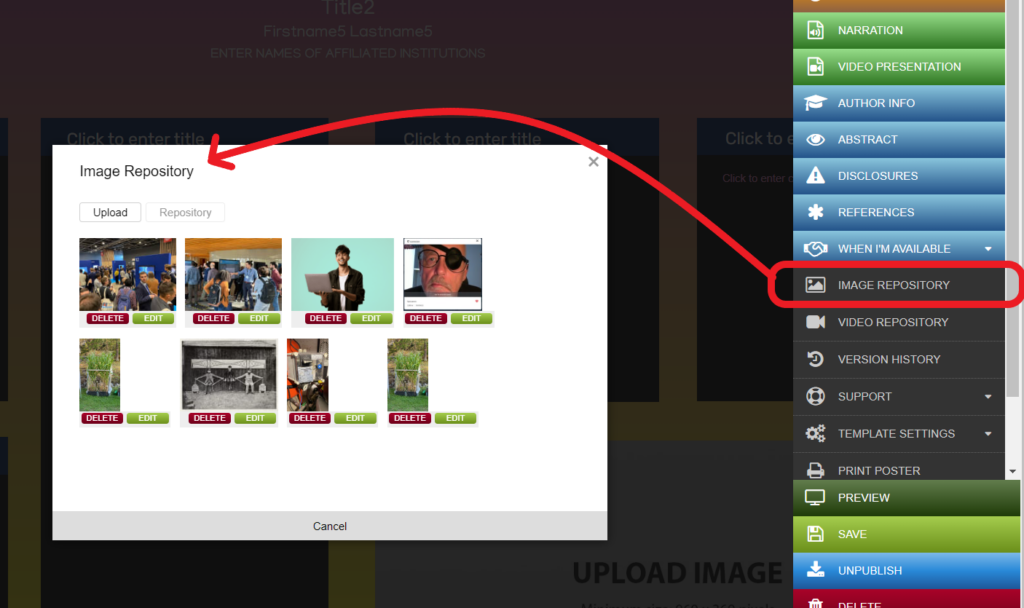
1. Either drag and drop your image into the upload box or click on the box to choose an image from your files. If you have previously uploaded images click on the ‘Image Repository’ tab to browse and select an existing image.
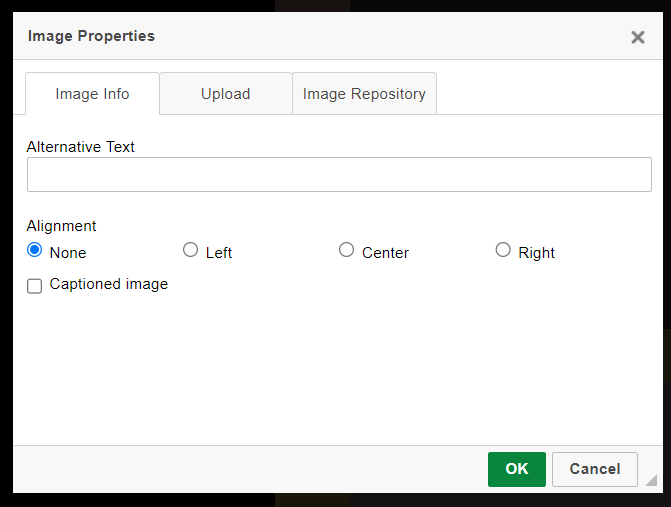
2. After dropping or selecting your image file allow approx. 10 seconds for it to upload. The Image Info tab will be displayed. You can choose to add captions or alternative text to your image or change the alignment using the options in this box. Click ‘Ok’.
3. The image is now inserted into the content box. You can double click on the image to return to the Image Info tab and change/update any of the settings here.
Accessing uploaded images
All uploaded images will be stored in the Image Repository on the main menu. When you click on the insert image tool you may choose to upload the image (as in the process outlined above) or you can insert an image that has already been uploaded. Simply click on the Image Repository tab to view your stored images.
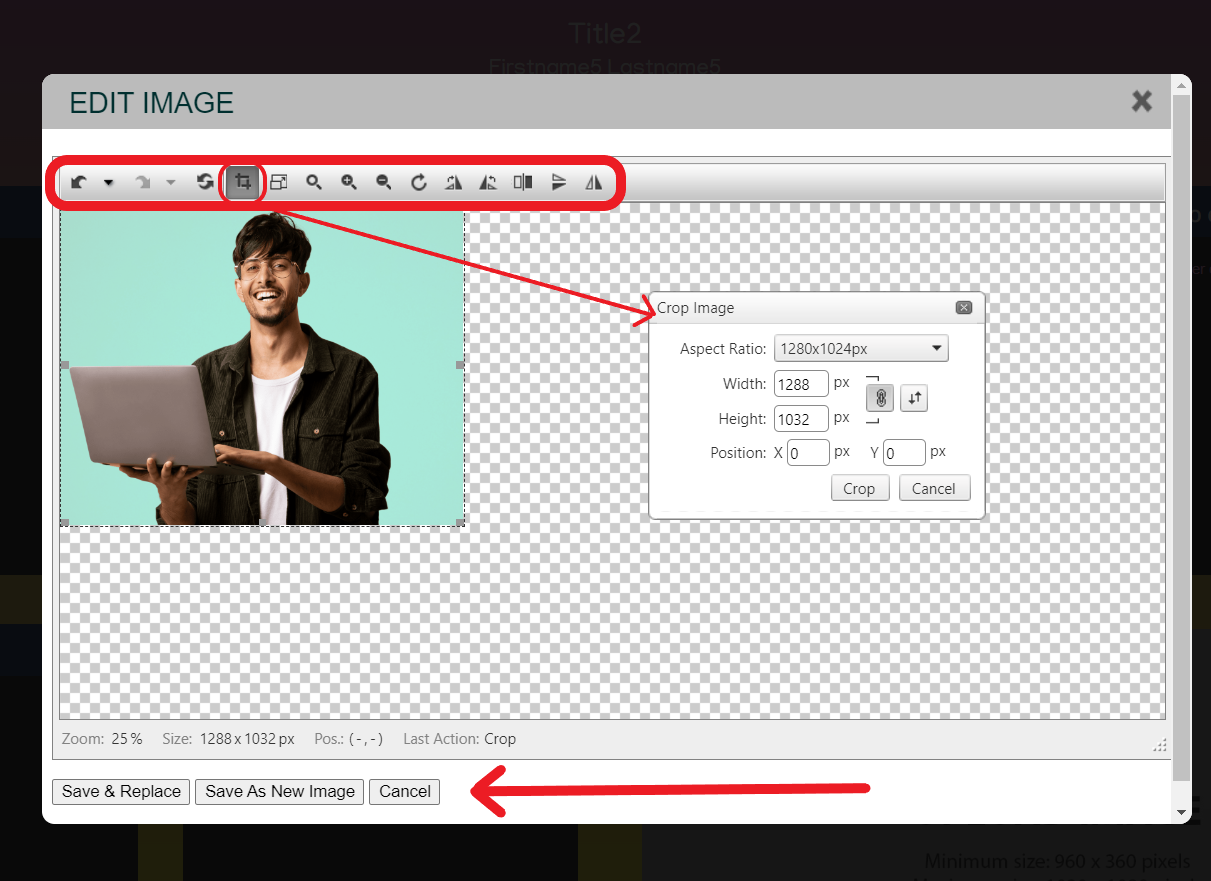
Editing images
Images can be edited to some degree within the iPoster system. From the Image Repository click on the green edit button under the relevant image. You can crop, re-size, rotate, or flip the image using the controls in the top menu. The below example shows the cropping tool. You can also zoom in or out on the image to make it easier to see the edits you’re making.
When you’ve completed your edits you can either save the edited image as a new image or replace the original image with the edited one.
Be sure toview our tutorials, which will give you a broad overview of the how to create your presentations.
Need further assistance? Reach out to our support team by sending a support request. Don’t forget to let us know which conference you’re creating a presentation for.
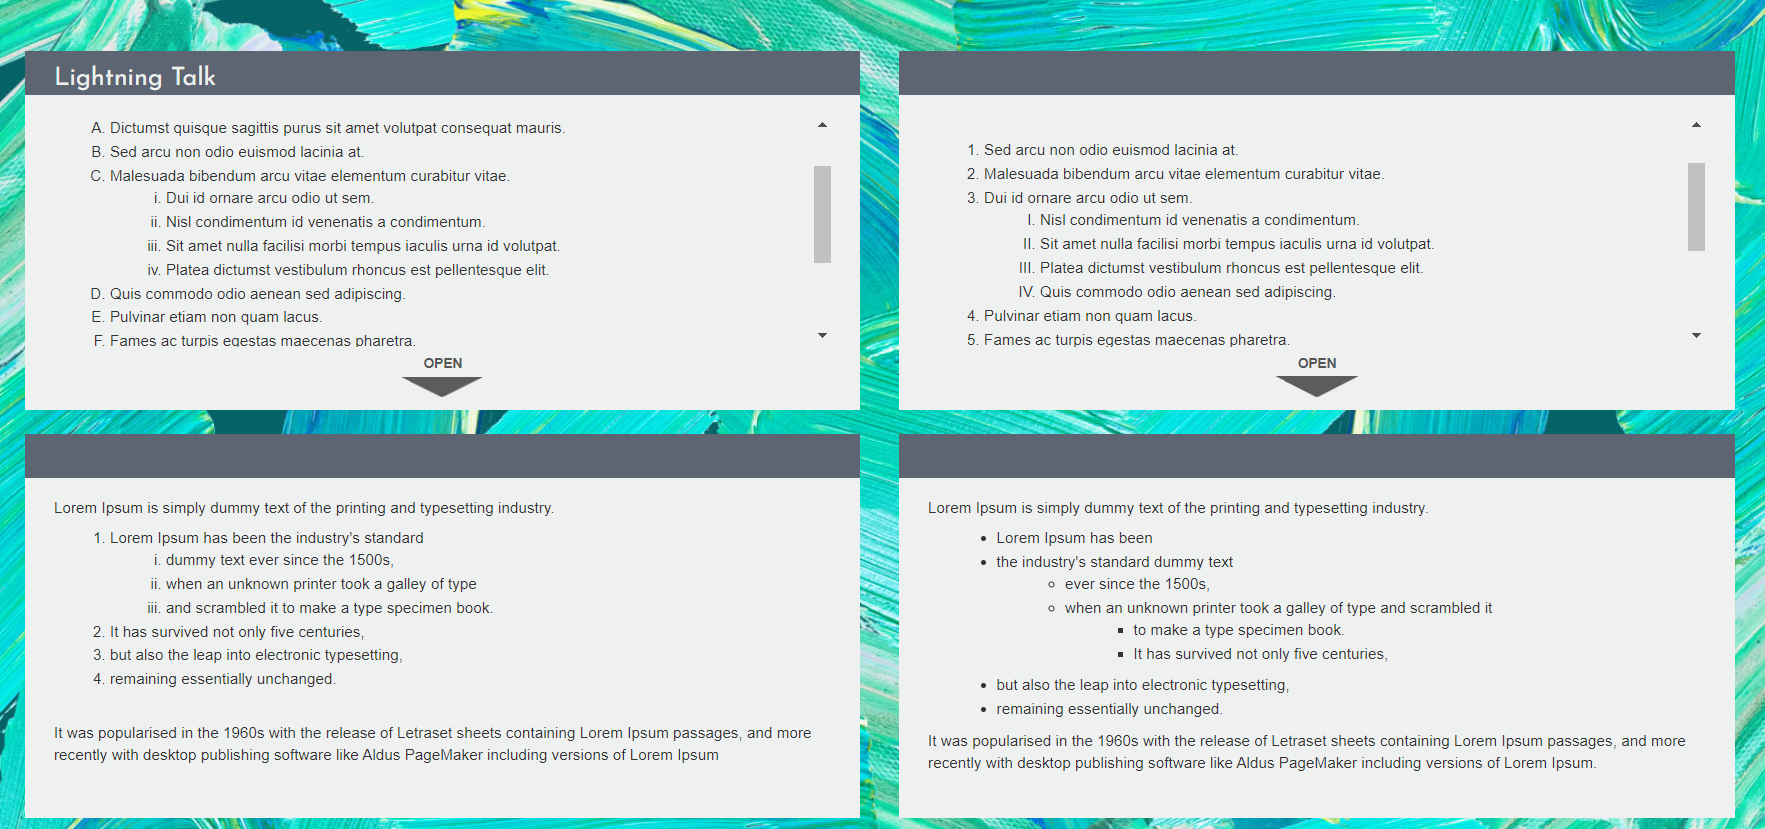
What are nested lists? Essentially a nested list is just a list contained within a list. For example, you might have a numbered list but then want to include sub items within it using roman numerals. Or you might want to have a bulleted list and change up the bullet style for your nested list. Follow the guide below to see how to create nested lists and edit the bullet or number types.
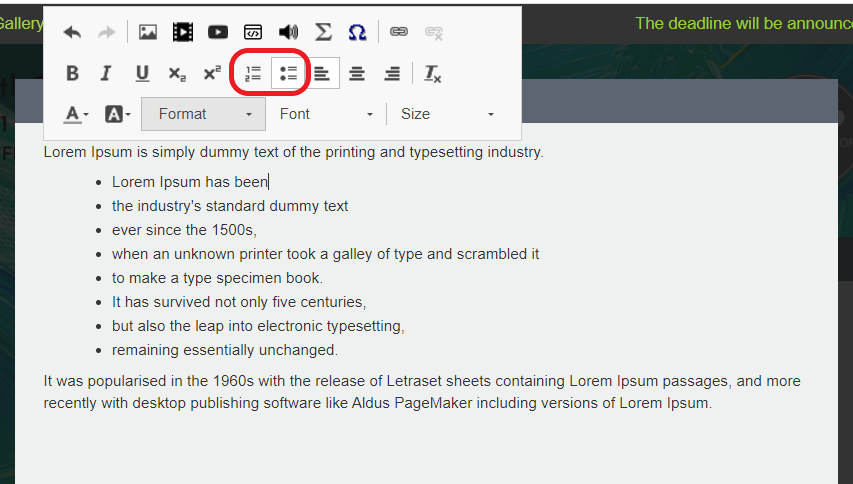
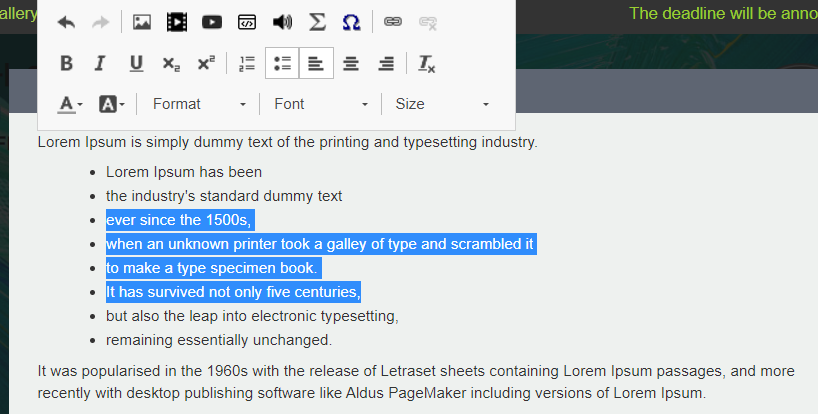
1. Start with your basic bulleted or numbered list – use these options on the tool bar to create one.
2. Select the text that should be part of the nested list
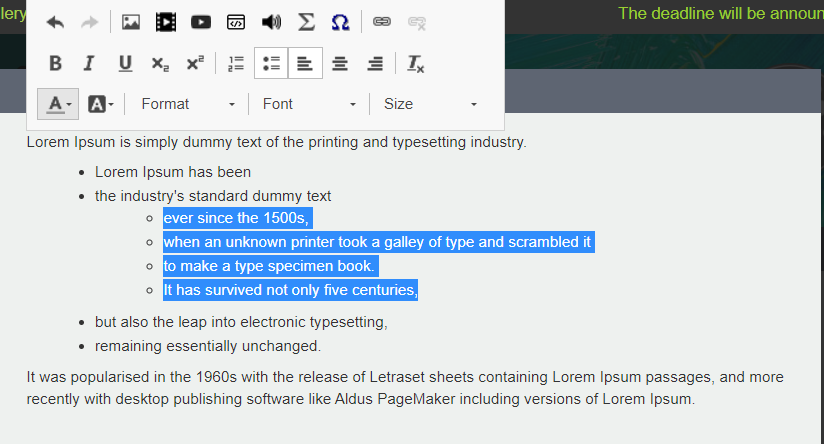
3. Click the ‘tab’ button on your keyboard. This will indent the highlighted text and apply a different bullet type.
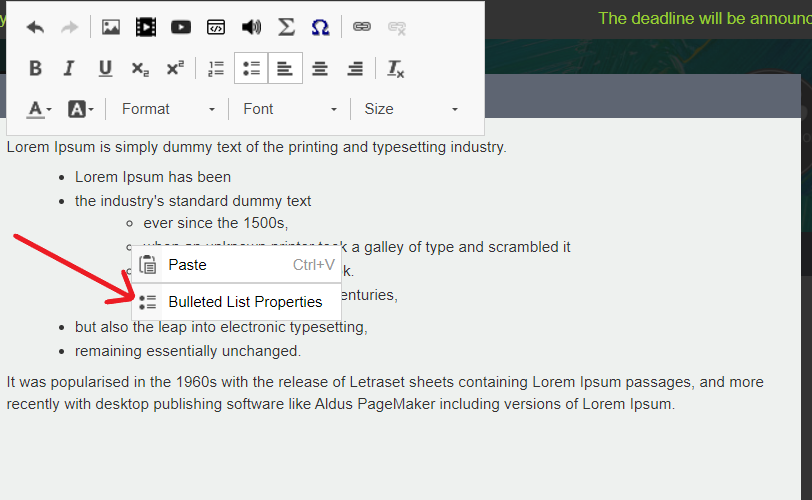
4. Change the bullet types by right clicking on each list of bullets. Click on the ‘Bulleted List Properties’ option.
5. Select a bullet option from the list. This can be edited on the main list as well.
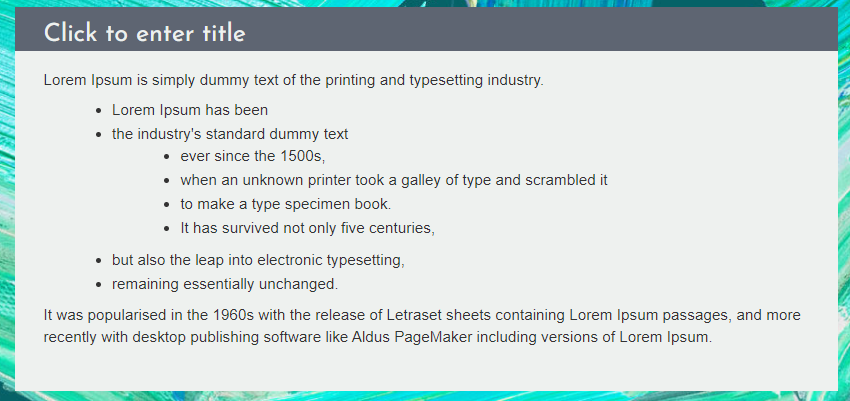
6. I have selected the disc option to match that of the main list
7. There are several different options for either bulleted or numbered lists. Here’s a look at some combinations.
Need further assistance? Reach out to our support team by sending a support request. Don’t forget to let us know which conference you’re creating a presentation for.
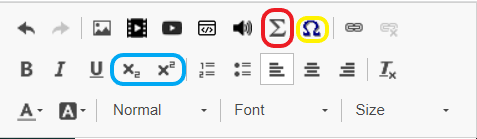
Place the cursor where you want to insert the special character in the text. Click on the appropriate button in the Tool Bar.
Σ- Insert equation tool
Ω – Insert symbol tool
X₂ X² – Subtext and Supertext
For Title and Subtitle fields
To add special characters into the title and subtitle fields you can use copy-and-paste. Here are super and subscript numbers and commas that you can use:
Superscript:
¹ ² ³ ⁴ ⁵ ⁶ ⁷ ⁸ ⁹ ⁰ ⸴
Subscript:
₁ ₂ ₃ ₄ ₅ ₆ ₇ ₈ ₉ ̦
You can also use any one of a number of online super- and subscript generators that can be found on the web. We recommend the following easy-to-use generators:
Download and then install the font Symbola by double-clicking the file Symbola.ttf
Restart the browser
Need further assistance? Reach out to our support team by sending a support request. Don’t forget to let us know which conference you’re creating a presentation for.
There is no button in the toolbox for line spacing. You can add double spacing in manually by clicking return/enter on your keyboard. In the condensed view of the iPoster the spacing will appear smaller. But when expanded in preview mode the spacing becomes bigger and the text is clearer to read as shown in the below images.
Make sure to check your text in preview before you start adding extra spacing in. When viewers are viewing your poster they will click on a content box to expand it and read the information in that box in the expanded view.
iPoster in preview mode condensed viewiPoster in preview mode with a content box expanded for reading.
Need further assistance? Reach out to our support team by sending a support request. Don’t forget to let us know which conference you’re creating a presentation for.
Image Use Agreement
Important Image Use Information
By copying or making any use of the image below, you acknowledge that
you have read and understand, and agree to, the Image Usage Agreement
below that governs your use of the Image. If you do not agree to the
Agreement’s terms, do not copy or use the Image in any way, unless you
have written permission signed by "Company".
Usage Agreement
Subject to the terms of this Agreement, you may use the Image solely
in whole for editorial use by press and/or industry analysts. This right
to use is personal to you and is not transferable by you to another
party. The Image cannot be used to promote or sell any product or
technology (such as on advertising, brochures, book-covers, stock
photos, t-shirts, or other promotional merchandise). You may not alter,
or modify the Image, in whole or in part, for any reason.
As between you and "Company", "Company" is and shall remain the sole and
exclusive owner of the Image. You will not delete, alter, or obfuscate
any proprietary legends relating to the Image, and each use will be
accompanied by the applicable proprietary attribution shown next to the
Image.
I have read, understood, and agree to the Image Usage Agreement
We use cookies on our website. Some of these cookies are necessary for our site to function at all, while others are only required for user experience and our statistics. By clicking “Accept”, you consent to the use of ALL the cookies we use. You may also click on 'Cookie Settings' to provide controlled consent Read More.
This website uses cookies to improve your experience while you navigate through the website. Out of these, the cookies that are categorized as necessary are stored on your browser as they are essential for the working of basic functionalities of the website. We also use third-party cookies that help us analyze and understand how you use this website. These cookies will be stored in your browser only with your consent. You also have the option to opt-out of these cookies. But opting out of some of these cookies may affect your browsing experience.
Necessary cookies are absolutely essential for the website to function properly. These cookies ensure basic functionalities and security features of the website, anonymously.
Cookie
Duration
Description
cookielawinfo-checkbox-analytics
11 months
This cookie is set by GDPR Cookie Consent plugin. The cookie is used to store the user consent for the cookies in the category "Analytics".
cookielawinfo-checkbox-functional
11 months
The cookie is set by GDPR cookie consent to record the user consent for the cookies in the category "Functional".
cookielawinfo-checkbox-necessary
11 months
This cookie is set by GDPR Cookie Consent plugin. The cookies is used to store the user consent for the cookies in the category "Necessary".
cookielawinfo-checkbox-others
11 months
This cookie is set by GDPR Cookie Consent plugin. The cookie is used to store the user consent for the cookies in the category "Other.
cookielawinfo-checkbox-performance
11 months
This cookie is set by GDPR Cookie Consent plugin. The cookie is used to store the user consent for the cookies in the category "Performance".
viewed_cookie_policy
11 months
The cookie is set by the GDPR Cookie Consent plugin and is used to store whether or not user has consented to the use of cookies. It does not store any personal data.
Functional cookies help to perform certain functionalities like sharing the content of the website on social media platforms, collect feedbacks, and other third-party features.
Performance cookies are used to understand and analyze the key performance indexes of the website which helps in delivering a better user experience for the visitors.
Analytical cookies are used to understand how visitors interact with the website. These cookies help provide information on metrics the number of visitors, bounce rate, traffic source, etc.
Advertisement cookies are used to provide visitors with relevant ads and marketing campaigns. These cookies track visitors across websites and collect information to provide customized ads.