How-to guides for all roles participating in SPEP ( Student Presentation Evaluation Program) at the 2024 Ocean Sciences Meeting. These guides are divided into relevant user roles within SPEP. Please note that you may have access to multiple user roles. Technical support documents for the iPosterSessions system can be found on the iPoster resources page.
SPEP Student
How to log in and start creating a presentation
1. Go to the OSM24 presenter login page and log in with your AGU member/universal account email and password.
2. If it’s your first time logging in you will see the iPoster Terms and Conditions. Read through the information provided (including the Privacy policy link in green) then click the 2 check boxes at the bottom of this page.

3. Next will be the SPEP Student Participation Agreement. Please read through this information and check the box to continue.
4. You will then come to the OSM24 Landing Page. From here you can access the OSM24 and SPEP galleries and iPoster and SPEP support links. Click on the ‘Presentation Editor’ button.

4. On the following page click on the ‘Next, choose your template’ button.

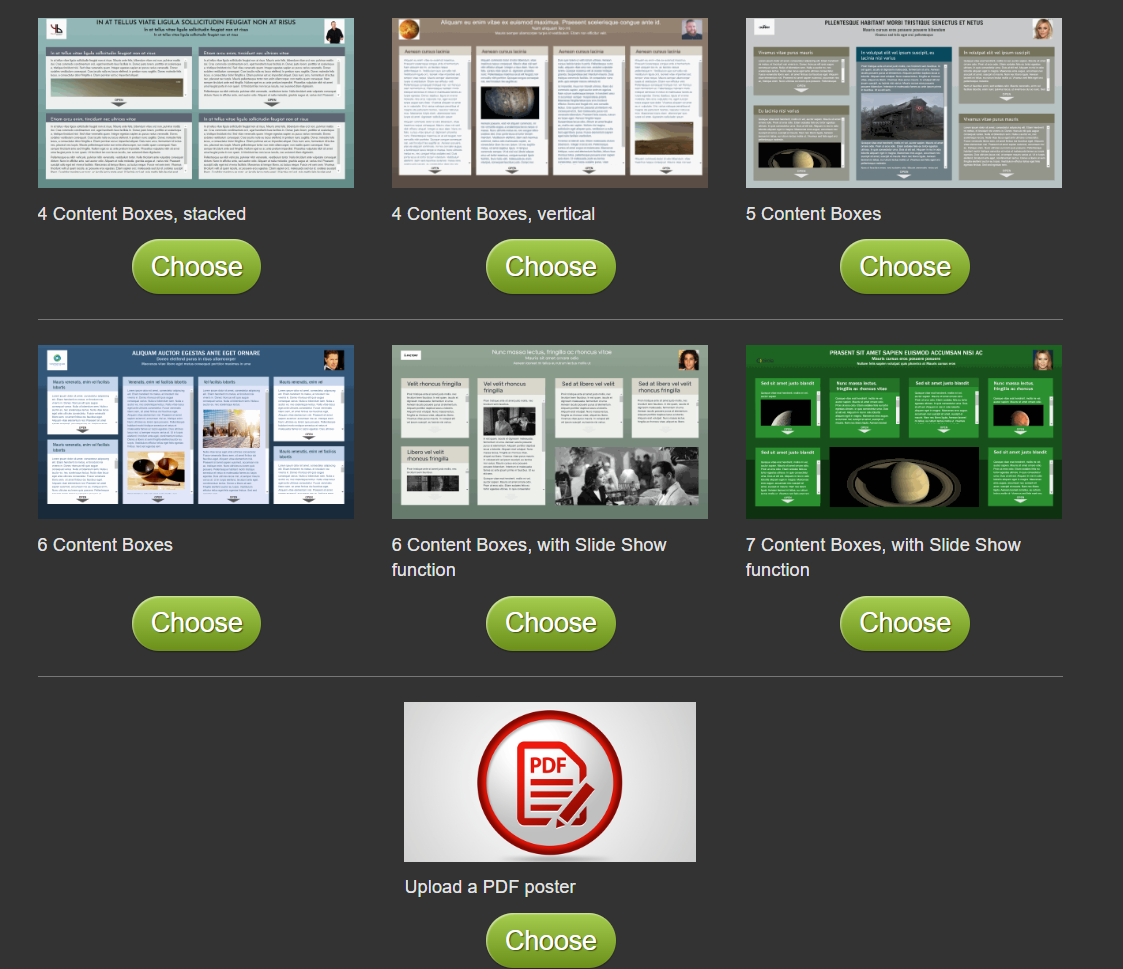
5. Choose either an interactive template (add images, text, videos, iframes and more) OR the PDF template, where you will upload a static PDF.
6. When you select your template your editor will be available as shown below. If you have multiple presentations to create you can access them via the gray box at the top of this page. You’ll go through the same template selection process for all of the presentations assigned to you.

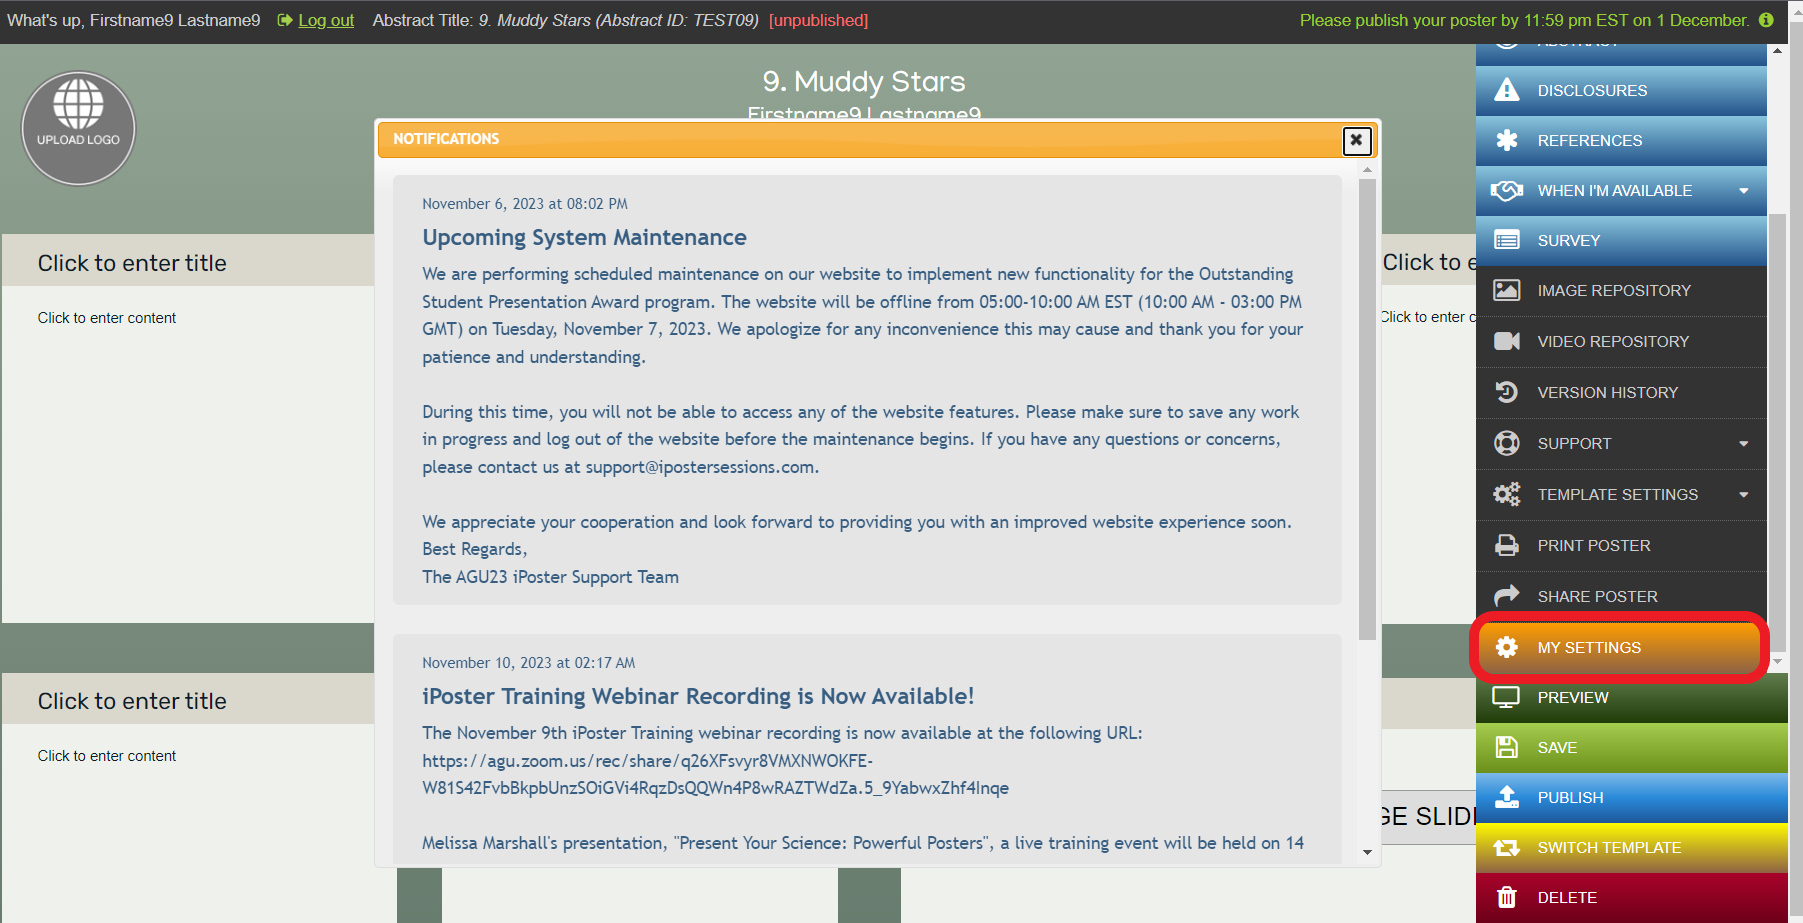
7. You may see pop up notifications when you log in. These are here to provide you with information about the system. Only new notifications will be shown in the pop-up. All previous ones will be archived and viewable in the My Settings section.
8. Now you are ready to start designing and creating your presentation. Please see our Quick Guide for an overview of how to navigate the iPoster Editor. You can also check out our resources page for tutorials, sample posters and FAQs.
Most of your technical questions can be answered through these resources. If you have a question about the iPoster system that isn’t answered here, you can email our support desk at [email protected]
How to view and respond to comments within an iPoster
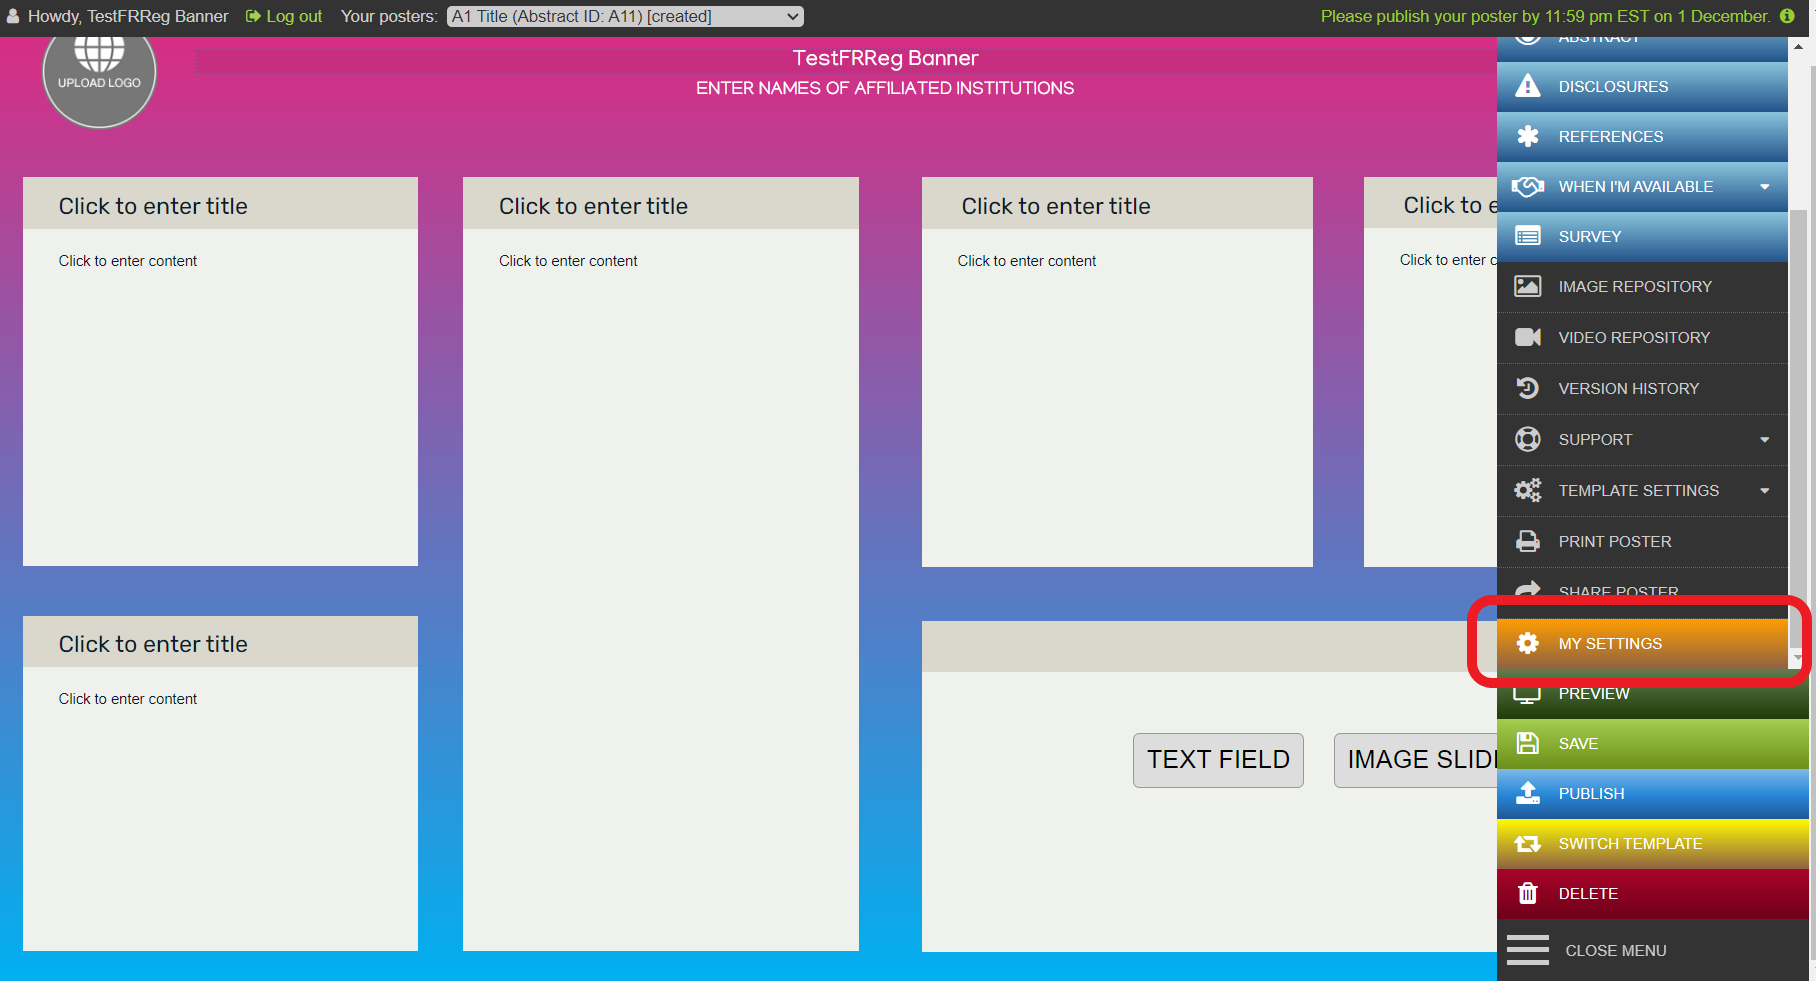
1. From your Editor page navigate to the Settings button on the main menu. You may need to scroll down in the menu to see this button.
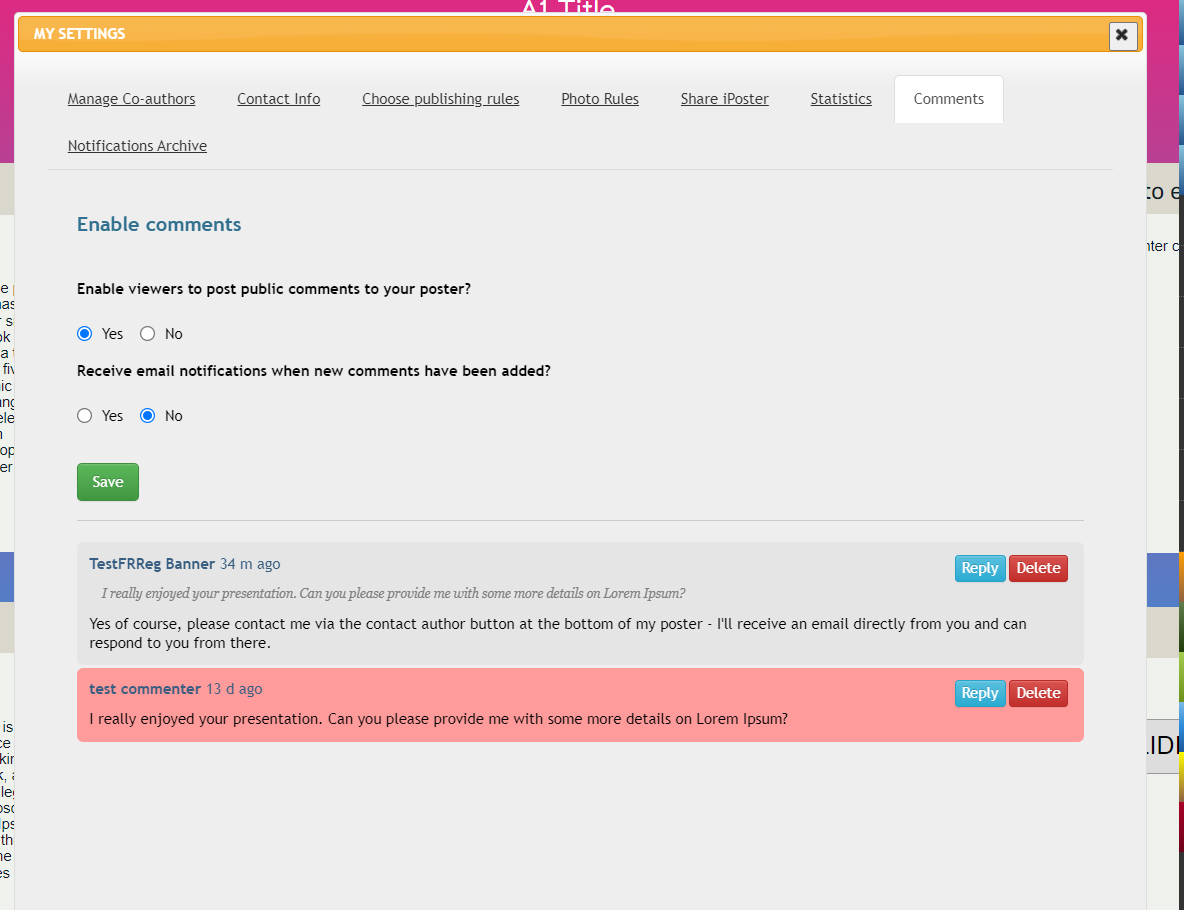
2.In My Settings , navigate to the tab called ‘Comments’. You can see any comments listed below the settings. To reply to a comment, simply click on ‘Reply’.
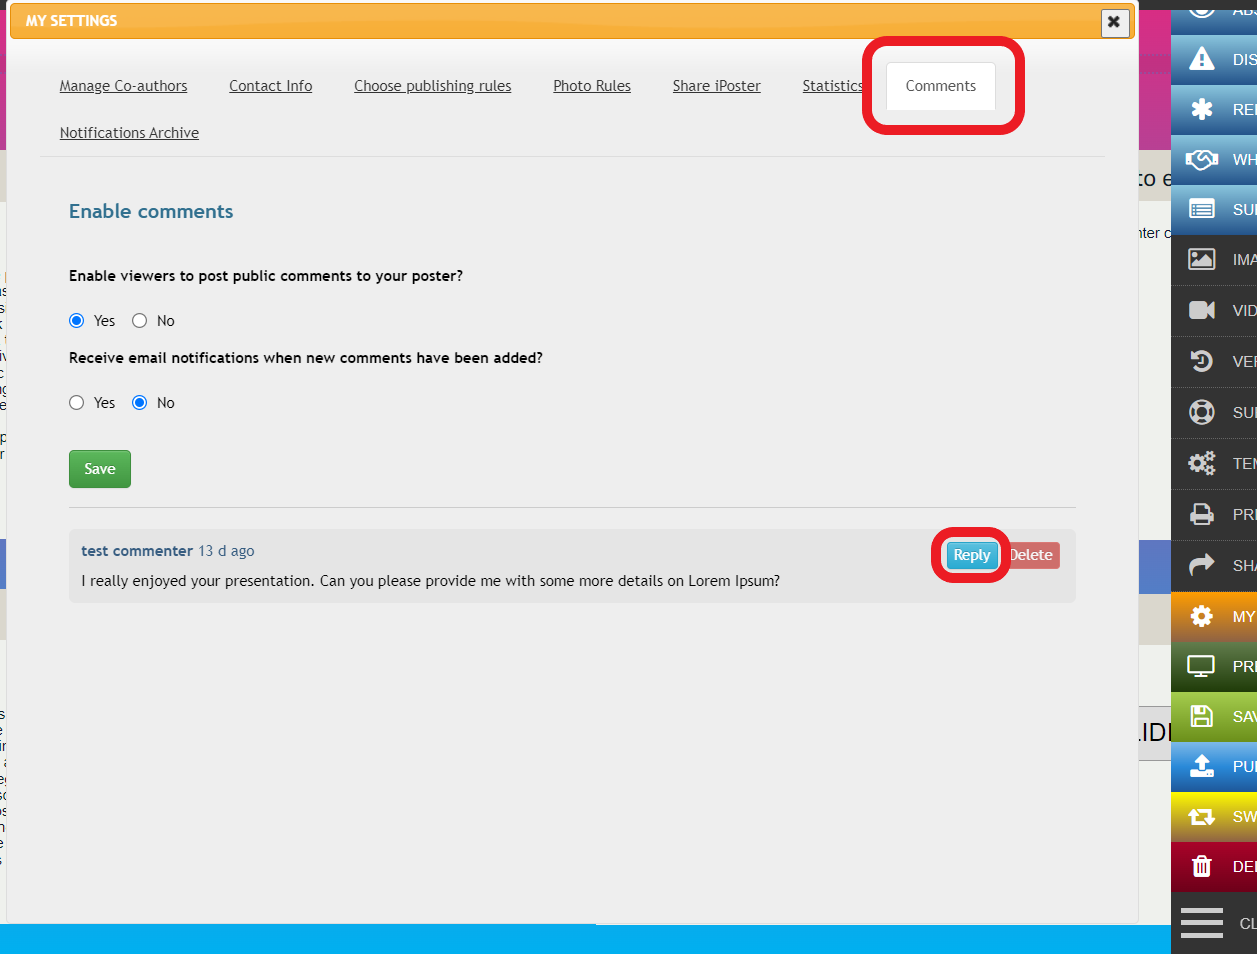
3.You can also update your comment settings on this page. If you would like to receive an email every time you receive a comment please toggle this setting to ‘Yes’.
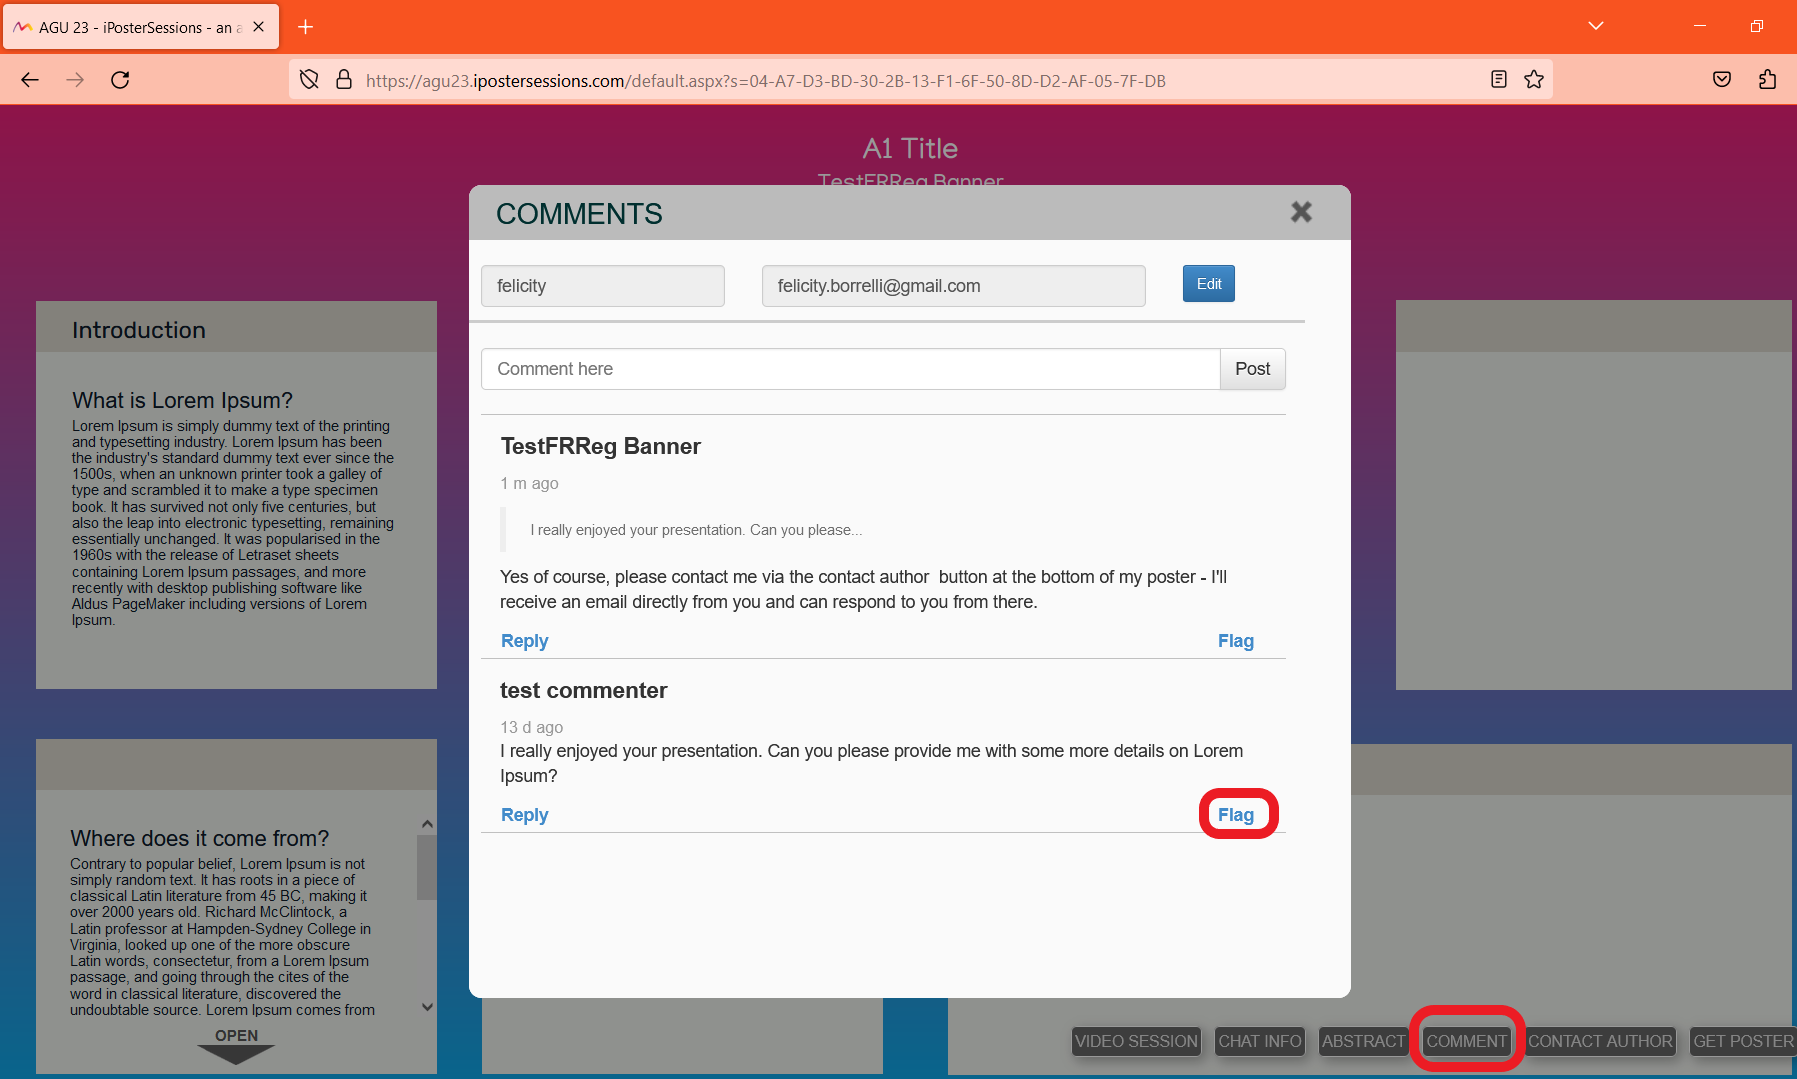
4. To flag a comment open your poster’s URL in another browser. You’ll be able to interact with it as if you were a visitor rather than an editor. Click on the comment button at the bottom of your poster, then click on ‘Flag’.
4. Return to your previous browser with the editor screen open on it and refresh the page. Open up the comments section again and the flagged comment should now be highlighted in red and you’ll be able to delete it.
5. Any time a comment is flagged you will receive an email notification of this, so that you can log in and review it.
SPEP Liaison
How to access and navigate the Liaison Dashboard
1. Go to the OSM log-in landing page and log in with your AGU member/universal account email and password.
2. On your first login you will be asked to read through and agree to the iPosterSessions Terms and Conditions and the Liaison User participation agreement. This won’t be required for successive logins.
3. You will arrive at the OSM Landing Page. You can access the OSM and SPEP galleries and any other relevant dashboards from here. You can always return to your landing page by clicking the green To Landing Page link at the top right of your screen.
Click on the ‘Liaison Dashboard’ button.

2. This is your Liaison Dashboard. Here you can check/action the following:
- Use the links at the top right to go to the SPEP Reviewer Gallery or the SPEP Resources page.
- Hover over the statistics to see an explanation of the number showing.
- Use the filters/search to find a specific author or group of authors. Export the data into Excel using the ‘Export’ button.
- Click the + sign next to an author’s name to expand their presentation meta data.
- Click ‘View’ next to an author to view their presentation.

How to view Presentations in the Reviewer gallery
1. From the Landing Page Click on the SPEP Gallery button. Or, from the Liaison Dashboard click on the Reviewer Gallery button a the top right of the screen.


2. You will come to the reviewer gallery where you can see all of the OSPA posters laid out in thumbnail mode. Use the top line of filters and search options to browse through the presentations. Use the bottom line of filters and search options to:
- Toggle between Thumbnail view and List view.
- Filter for presentations based on the number of reviewers who are committed to review them
- Sort using various sort options like ‘most popular’ or ‘A-Z’
Use the ‘To Landing Page’ button at the top right to return to your Landing Page at any time.

List view of Reviewer gallery – The default view is Thumbnails, but you can change this in the view option shown below:

3. Presentations that have not been created will have a purple thumbnail with the text: Poster not created: click there to view the abstract. There will also be a white box showing ‘Not Created’ on it. This means that the student hasn’t started building their presentation.
You can still click on these presentations and you will be shown the poster abstract, as seen in the below screenshot. There is a REVIEW SPEP PRESENTATION button to the bottom right – this is used by Reviewers to commit to a presentation. Use the back screen arrow at the bottom left to return to the gallery.

Presentations that have been created, but not yet published will either have a green thumbnail, or they will show a thumbnail of the presentation in progress.
How to view and export reports
1. There are two ways to filter a report from the dashboard. First, you can do a quick filter by clicking the buttons in the Student statistics section to show relevant posters for each statistic listed. For example, in the screenshot below I have clicked on the number next to ‘Presentations Published’ and there are 69 presentations that fit into this filter. Don’t forget to click the ‘Reset filter’ button when you’re done.

2. The second way is to add more detailed filters in using the options in the filter bar as shown below. I have added filters to the following fields: Reviewers, Published, Session type and Session start time. There are about 10 presentations matching these filters.
*Note: You can also use these 2 filters in combination with each other
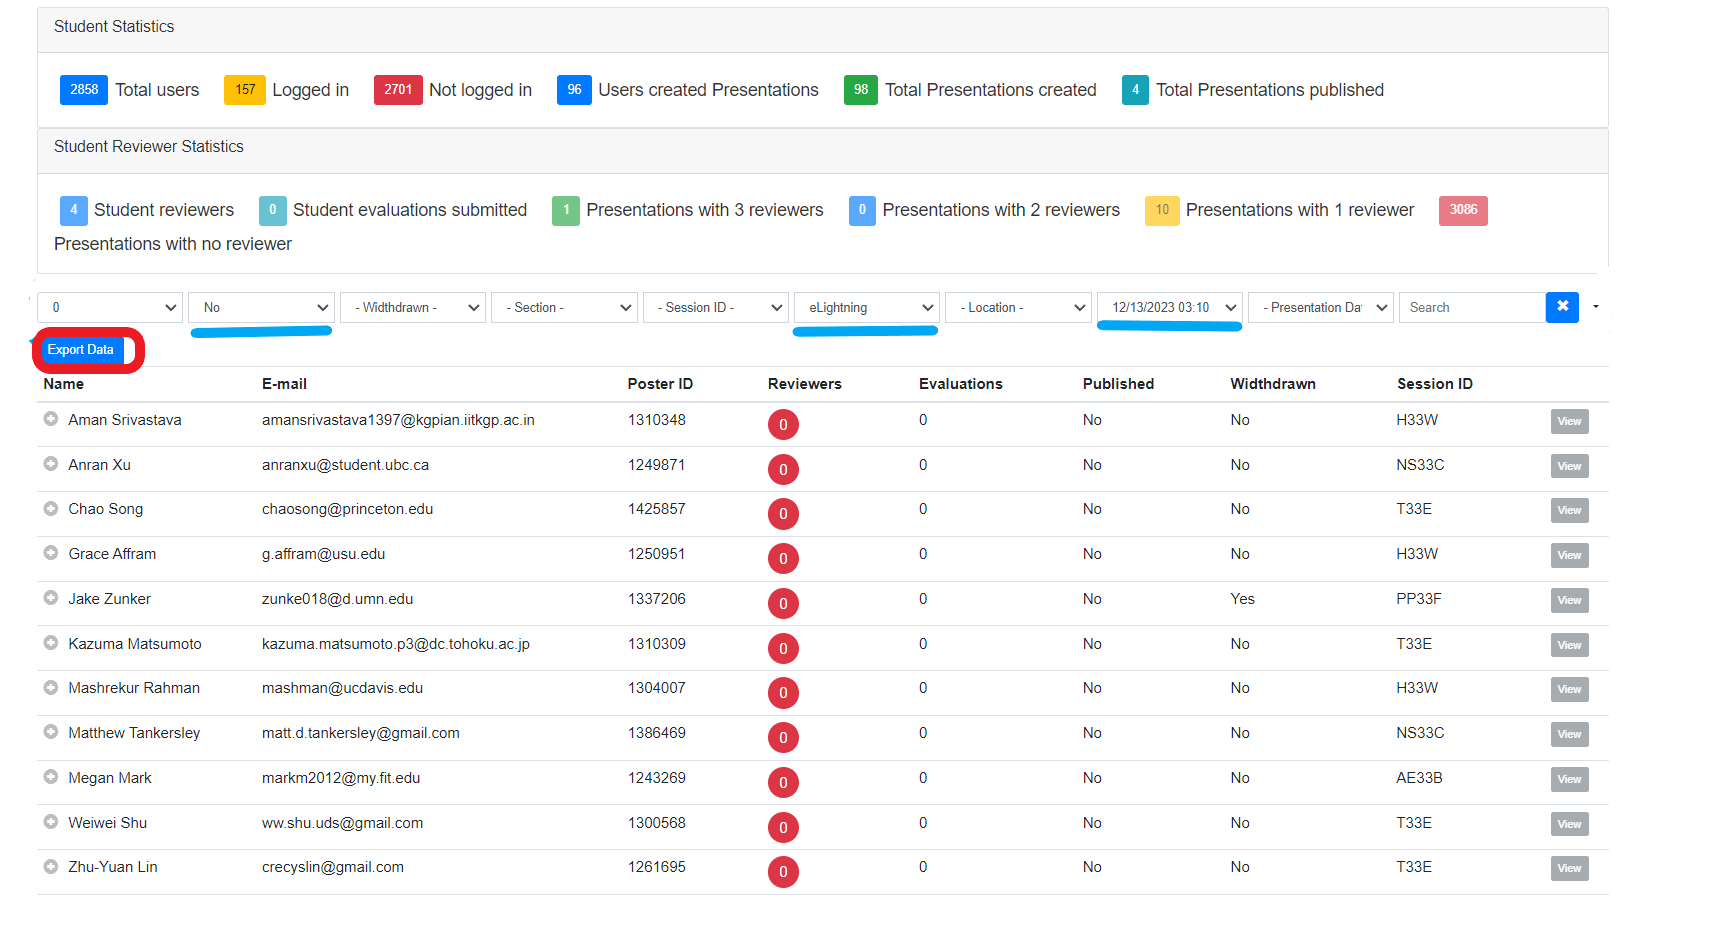
3. To expand the meta data for an individual student in the list, click on the + symbol next to their name.

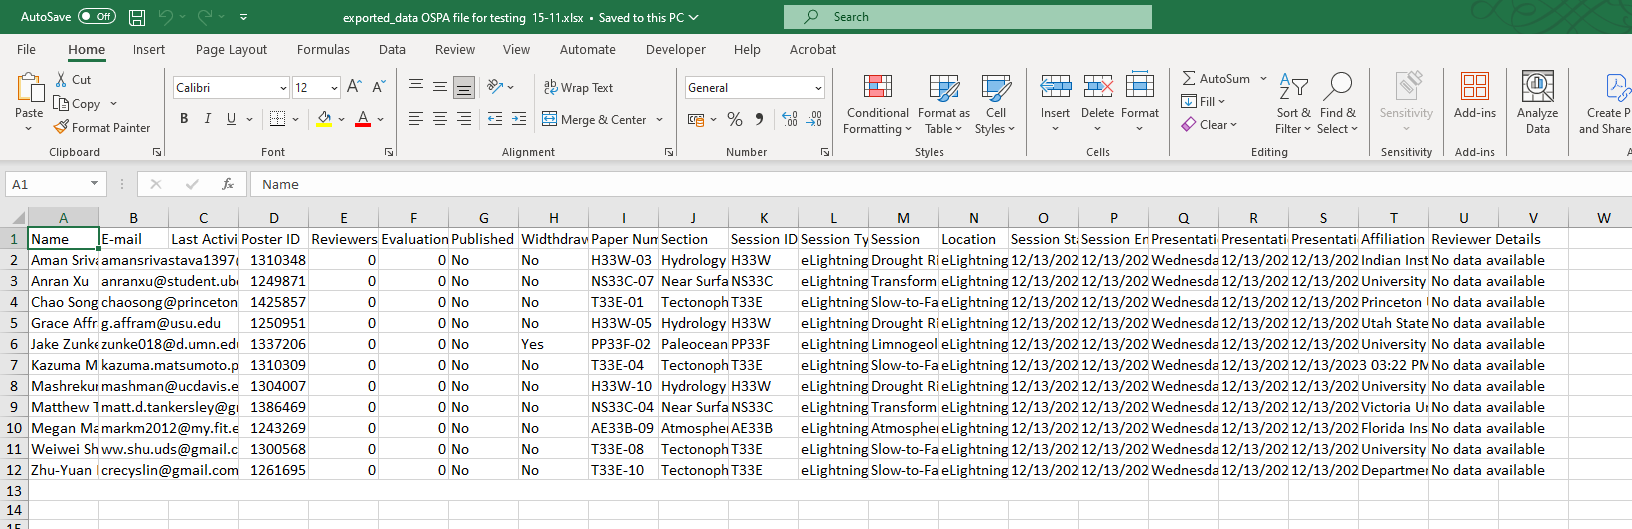
4. Finally, if you want to export your report into Excel click on the Export Data button. You will be prompted to save the name of your download. It should then be downloaded into your download folder.
The download will include all of the meta data available in the system for this user.
SPEP Reviewer
How to sign up as a reviewer for a presentation
To sign up as a reviewer go to the OSM login landing page and sign in using your AGU universal login credentials.
1. Click on the ‘SPEP Reviewer Gallery’ button.

2. In the reviewer gallery you can search for the presentations that you wish to review. Use the filters at the top of the gallery to hone in on relevant presentations. When you have found one click on it.

3. The presentations will be in one of three statues: Not Created, Unpublished (but created) and Published . You can still apply to be a reviewer no matter which status they are in. If the presentation is not yet published you will see a plain page with the Poster abstract only as shown in the example below.
4. Click on ‘Review SPEP Presentation’ at the bottom right of the screen.

5. Fill in your affiliation/institution then click on ‘Commit’. You will only be asked to fill this information in once.

You will now be taken to the Reviewer consent page:

6. Once you have agreed to the Reviewer Participation Agreement you will be taken to Your Reviewer Dashboard. This is where you will find all of the presentations you have committed to review.
- Click on ‘Reviewer Gallery’ to continue to sign up to review presentations.
- Click on ‘To Landing Page’ in the top right corner to go to the OSM 24 Landing page.
- Click on ‘open’ to start your evaluation.
- Click on the presentation thumbnail image if you want to uncommit from reviewing the presentation. Please note you cannot uncommit after you have opened the rubric.

How to start, save and submit an evaluation
1. Login to the iPoster/OSM landing page using your universal AGU login. Click on the ‘My Reviewer Dashboard’ button.

2. Click on the ‘Open’ button next to the Presentation that you want to review.

3. The evaluation instructions will be shown. Click on ‘Start’

4. The evaluation for SPEP is 3 short answer questions. The last question is optional. Use the buttons below to save your progress or go back or forward through the evaluation.
- What were the primary strengths of the presentation and why?
- How could the presentation be improved?
- Additional comments to the presenter (optional).

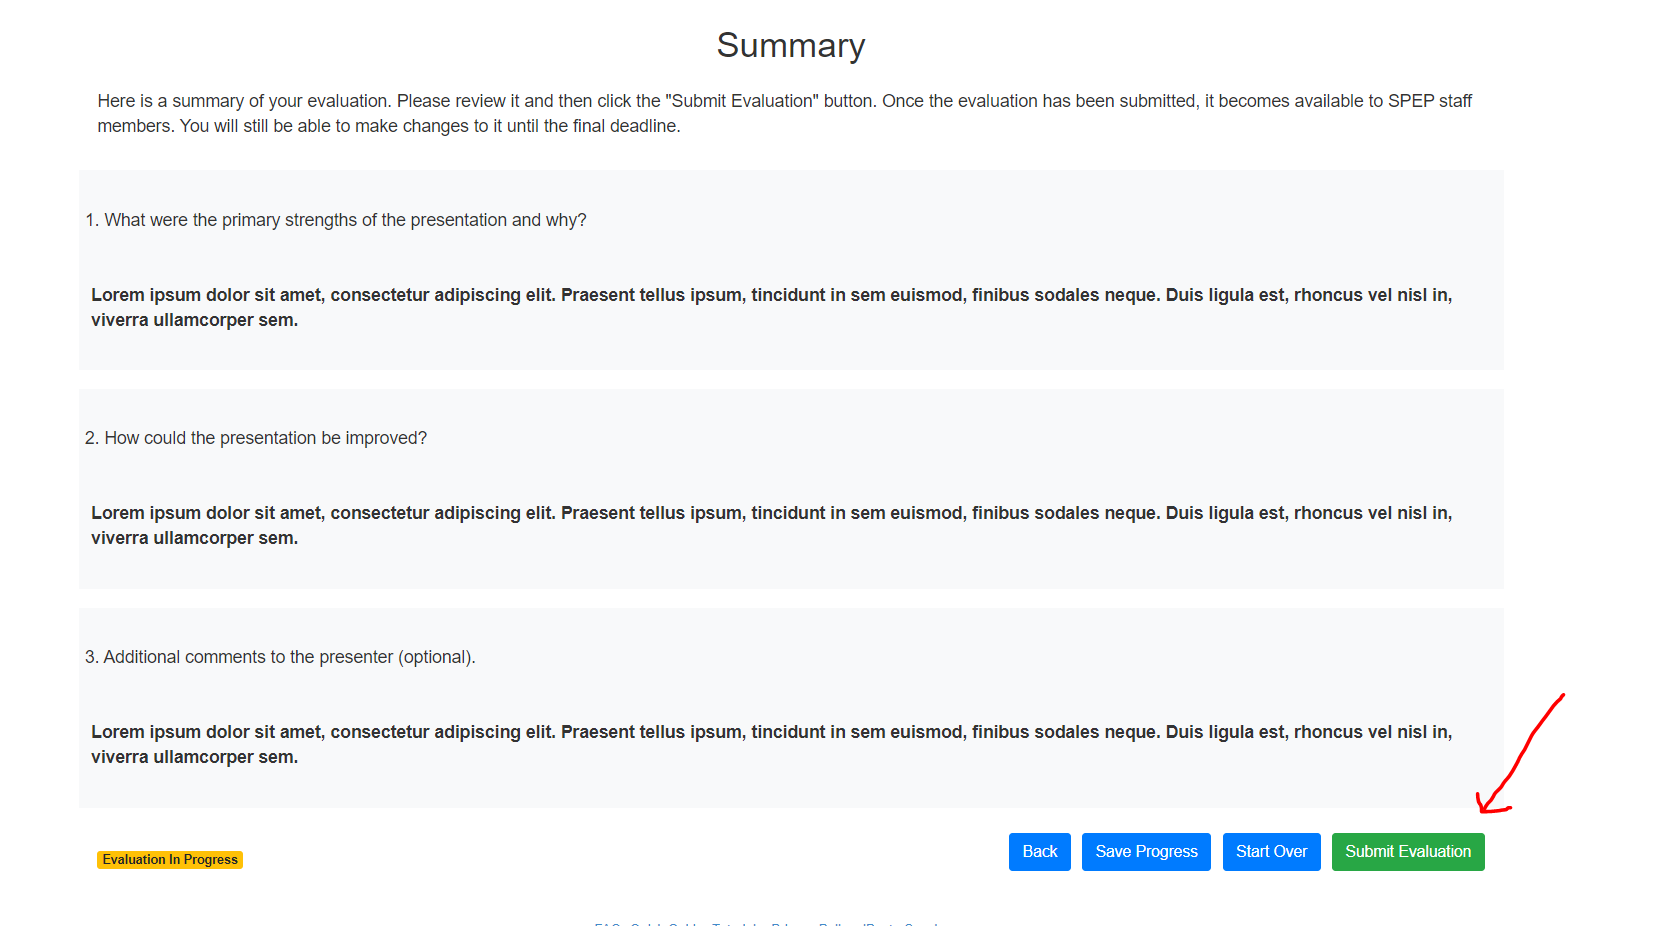
5. The final page is a summary of your answers. Click Submit Evaluation when you are ready to submit.
6. The following message will be displayed. You have until 11:59pm (ET) on the 8th March to edit your evaluation. You can edit your evaluation by opening it again and clicking on the ‘Back’ button to get to the questions.
