NOTE: You can not book a time if you haven’t added enough content to your presentation.
Book a time for your iPoster presentation using the built-in booking schedule. Please note that this tool is not available on all conferences. If it is enabled on your conference you can access the schedule under the ‘When I’m Available’ button on the main menu in your editor. Follow the guide below to see how it works.
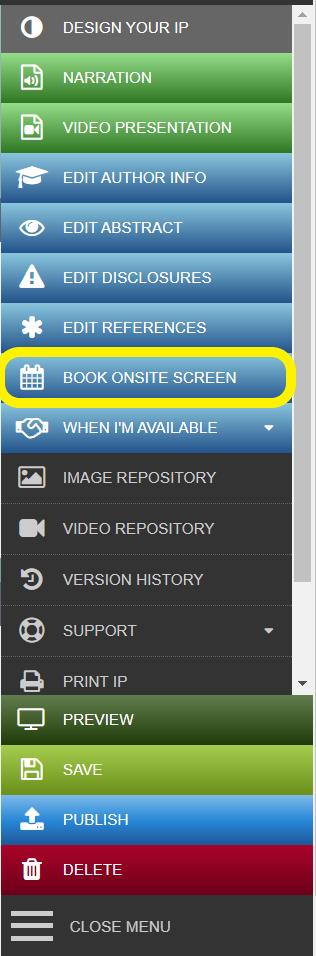
1. Click on BOOK ONSITE SCREEN under the ‘When I’m Available’ button on the main menu.
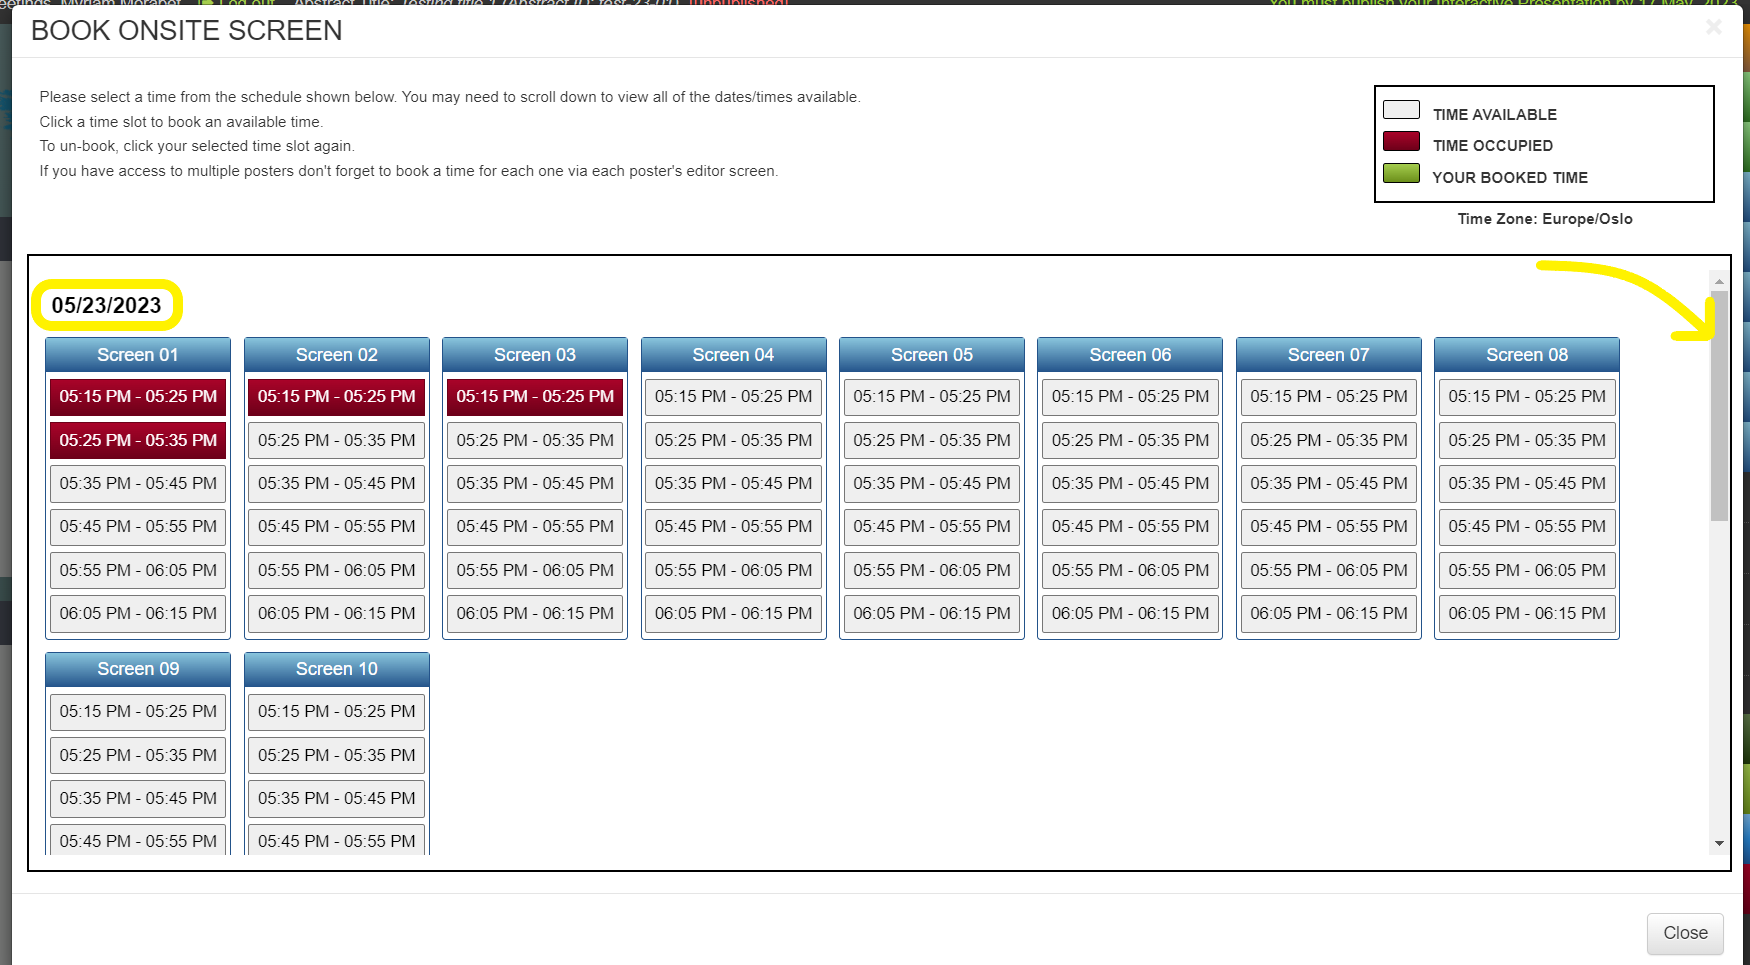
2. Here you will see the schedule of times/dates available to select from. Gray boxes are available times. Red boxes are unavailable times. The presentation date is shown above the screens. Don’t forget to scroll down to view the complete schedule.
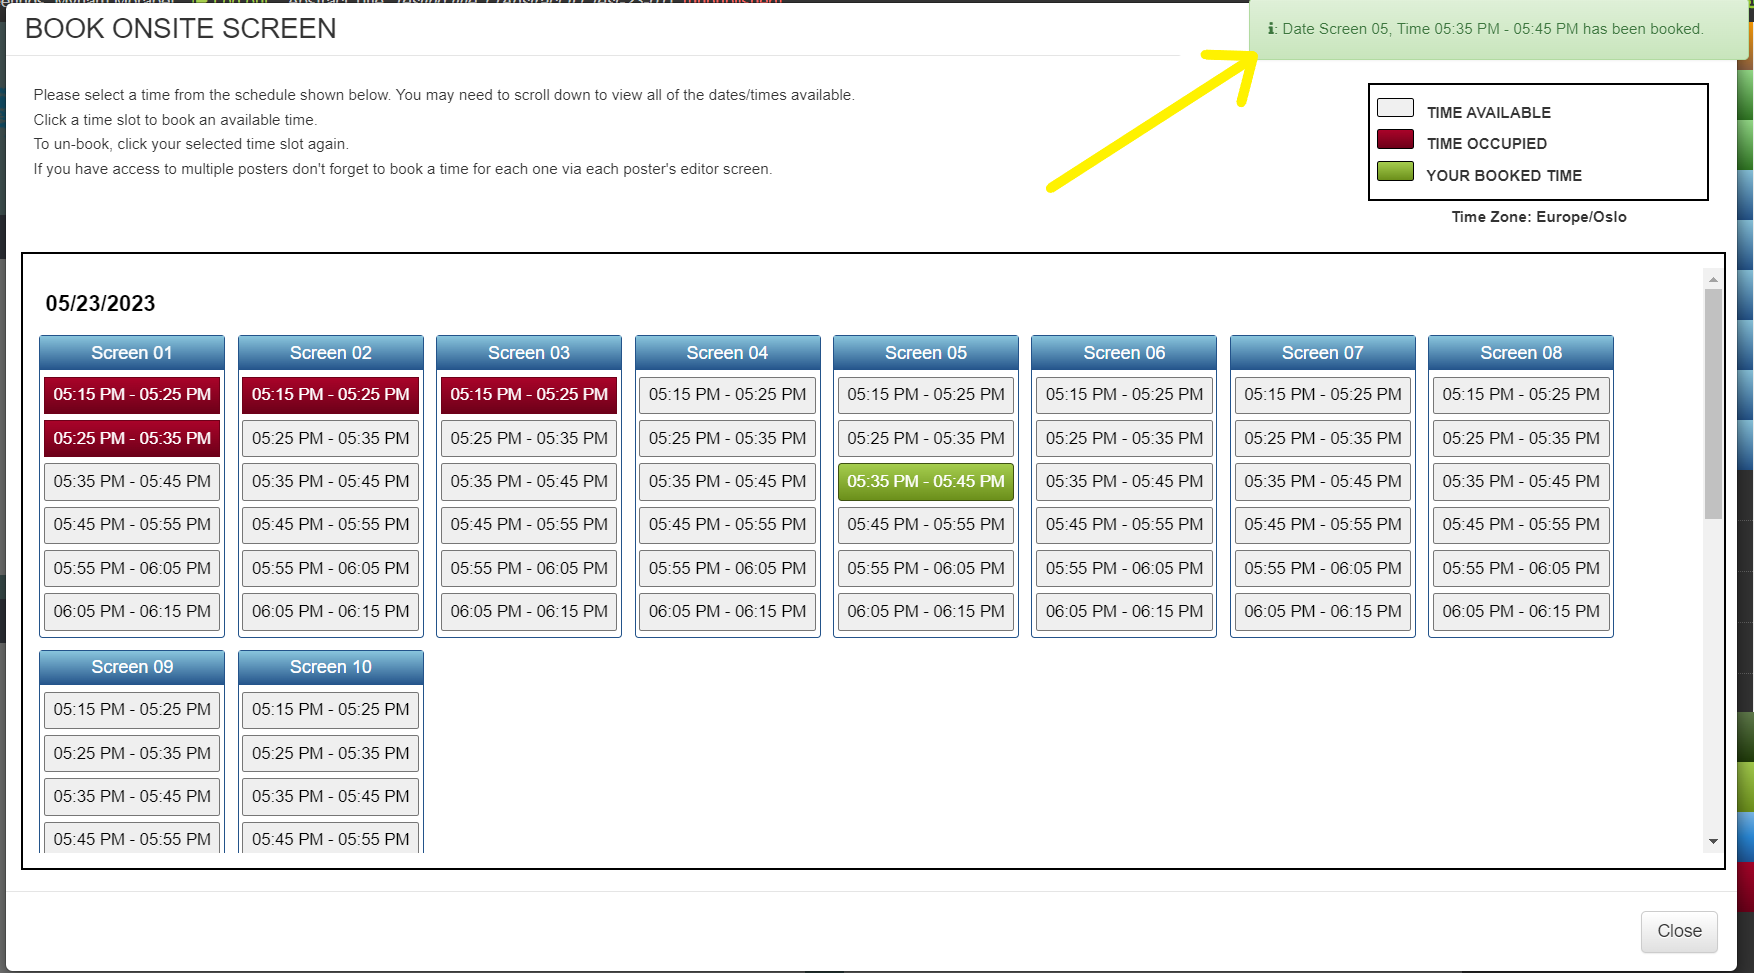
3. To book a time slot simply click on any available one that you want. When you have clicked on it you will see that it turns green and a green pop up message will show advising that you have booked this time.
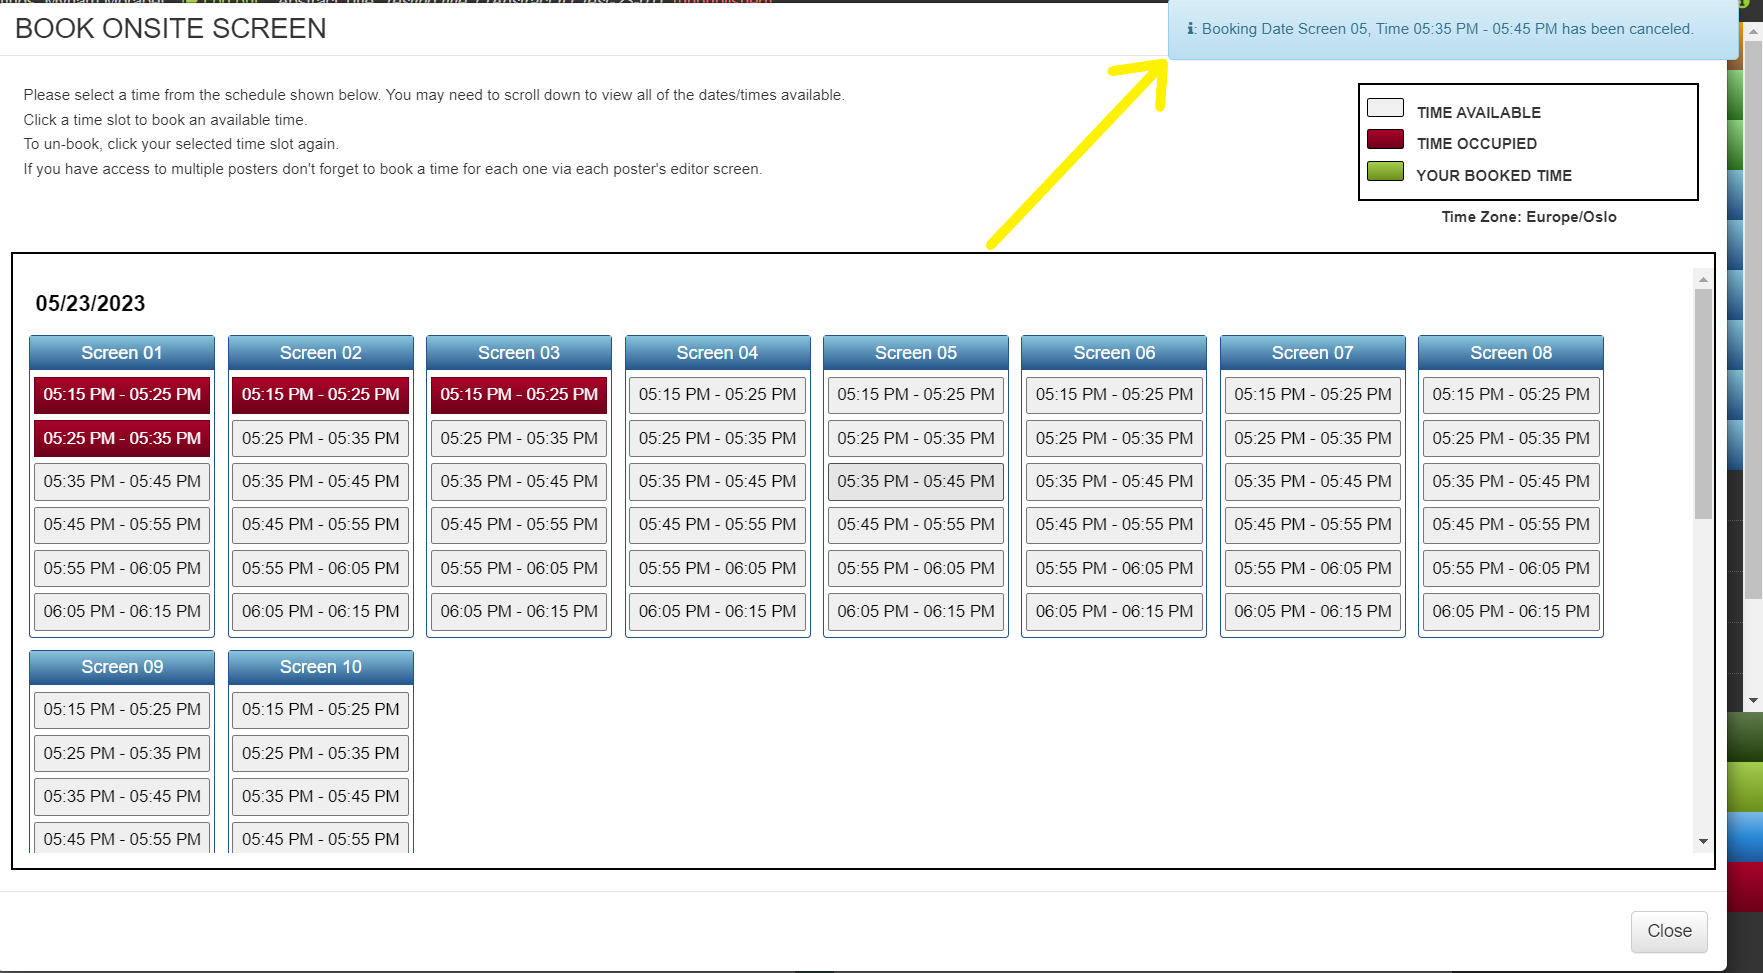
4. To un- book a time slot simply click on your selected booking. You will see a blue notification advising that your timeslot has been un-booked. And now you can select a different time.
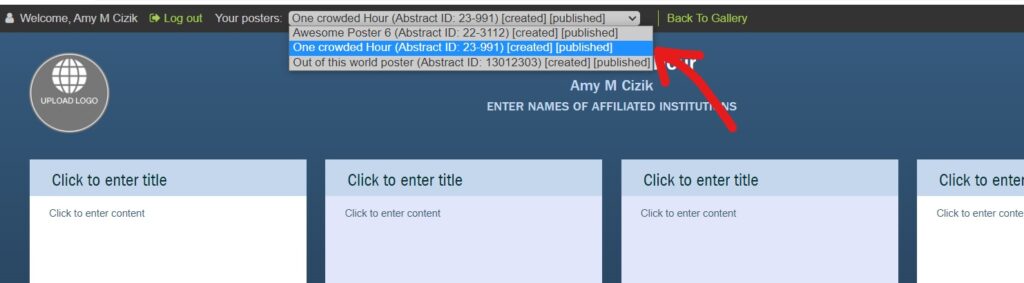
5. If you have access to multiple posters don’t forget to book a time for each one. You must select a timeslot via each poster’s editor screen. Use the gray box at the top of your screen to toggle between your posters. You will see the booked times for each of your posters show up as green in the schedule, but you can only edit the booking for the poster in the current editing screen.
Need further assistance? Reach out to our support team by sending a support request. Don’t forget to let us know which conference you’re creating a presentation for.