Logging in, saving, publishing and sharing.

How to create an iPoster from a PDF (or another source)

You can copy paste your texts from a PDF, PPT or other source directly into the iPoster system. When you copy from another source a ‘Paste’ box will pop up. Paste the text into this and click ‘Ok’ This will clear any formatting from the text and any hidden code that may affect the system. You’ll then be able to format your text using the available tools.

You can transfer any image, graphs, or tables over by saving them as images on your computer, then uploading them using the ‘Image Upload’ tool. See the section below titled ‘To upload diagrams, charts and tables’…

To copy/paste text…

1. Copy the text that you want to add to your iPoster. Place the curser in the text box where you would like the pasted text to start and right click on the mouse. The following ‘paste’ button should appear:

2. Place the curser in the text box where you want to add the pasted text and right click on the mouse to select paste or use the keyboard shortcut: Ctrl + v.
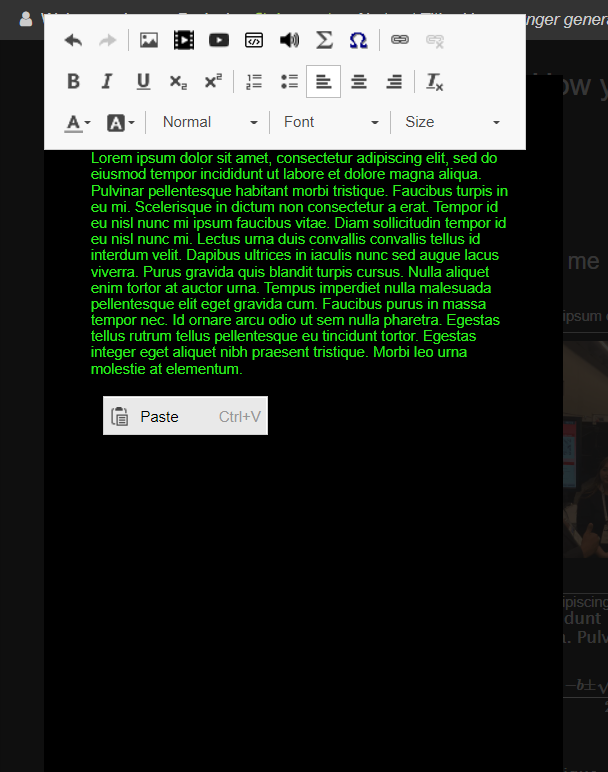
3. After clicking on ‘Paste’ or Ctrl + V, the following dialogue box will show up. Paste the copied text into this box. Click the ‘Ok’ button at the bottom of the pop up and your text should appear in the content box.
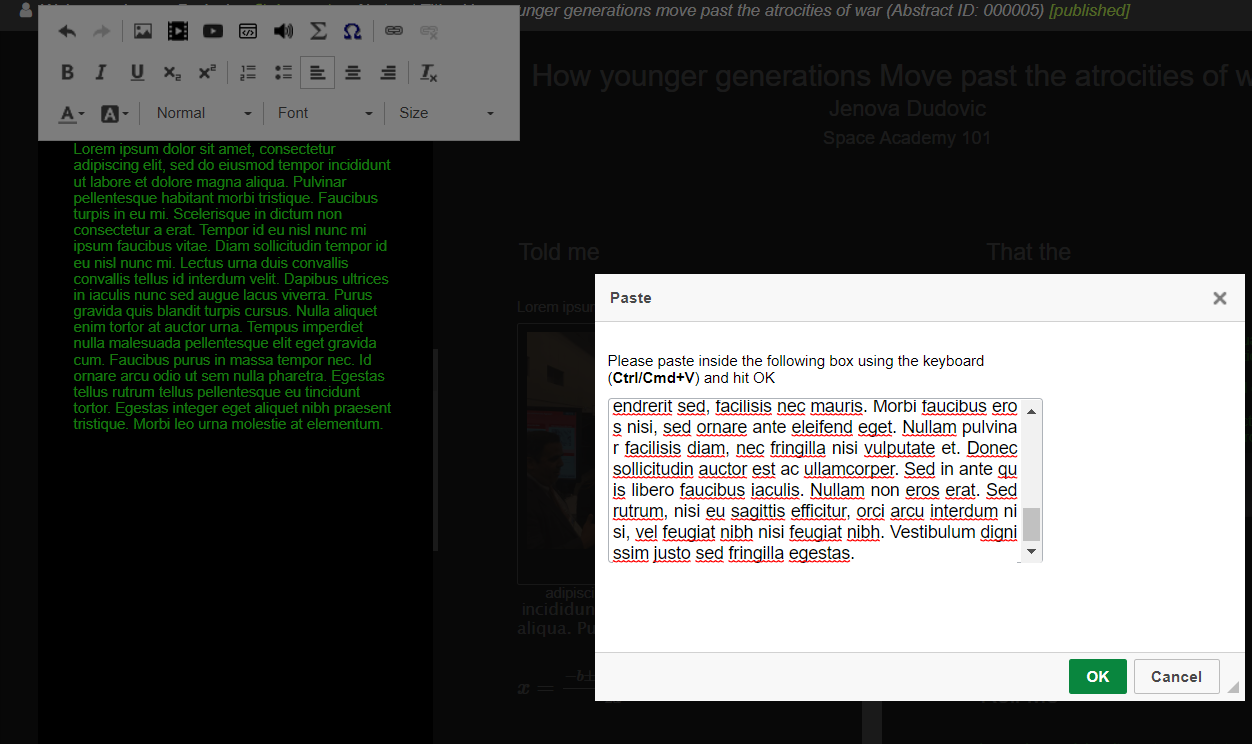
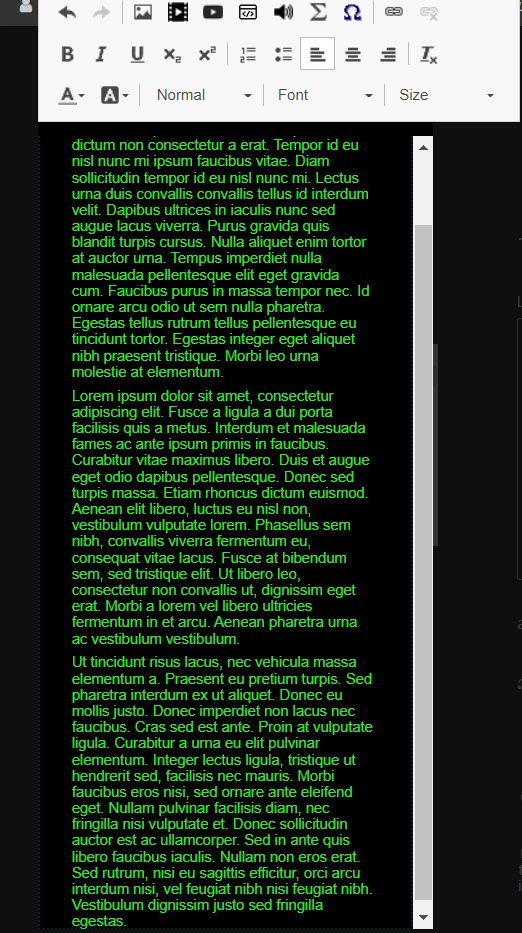
4. After clicking on ‘Paste’ or Ctrl + V, the following dialogue box will show up. Paste the copied text into this box. Click the ‘Ok’ button at the bottom of the pop up and your text should appear in the content box.

To upload diagrams, charts and tables…

Diagrams, charts, tables, etc need to be inserted as images. Either export them from their source program as JPG or PNG, or take a screen shot. Make them as large as possible, and then import them into your content boxes. That way they will expand to make it easy for your visitors to view them.

The size of your images is important because it will impact the quality of your overall presentation.  Ensure that your images are as large as possible so that they have maximum impact for the end viewer.  

Images must be in JPG, PNG or GIF format. When inserting images, remember that they will expand to their full size when tapped or clicked on by visitors or by you during your presentation. So, make sure your images are as large as possible – up to 1920 x1080 pixels. And if available, use the original images for best quality. If they are not available, take screen shots of your images, but zoom in before you take them so that, again, they are as large as possible.

Remember that an iPoster can contain so much more than an upload of a  PDF or PowerPoint, so try to take advantage of this by including:

  • Videos
  • Sound files
  • Links to dynamic external information (e.g. online data sets, visualizations, etc…)
  • As much content as you feel is necessary to present your research with the detail it deserves. There are no content limits.  As soon as you exceed the apparent physical space of a content box, it will scroll.

As you proceed, save your progress then check your work by clicking on the Preview button. You’ll get a close approximation of how your presentation will look on the HD screens, and can test all of the functionality: content boxes and images expand when clicked, videos play correctly, external links connect, etc…

Slideshow Images

The slide show window (available in some templates) has a minimum image size requirement of  960×360 pixels, but  we recommend that you insert images up to 1920×1080 pixels.

When you look at the slide show in the condensed view any images larger than 960×360 will be cropped. However when you or an end viewer click or tap on the slide show in preview mode or at the conference, it will open up as an overlay and show all images at their full size.

Conference participants will then be able to flick through the slideshow as they wish. Having larger images will provide a more enjoyable and better quality viewing experience for them.

Adding an image to an iPoster content box

1. Either drag and drop your image into the upload box or click on the box to choose an image from your files. If you have previously uploaded images click on the ‘Image Repository’ tab to browse and select an existing image.
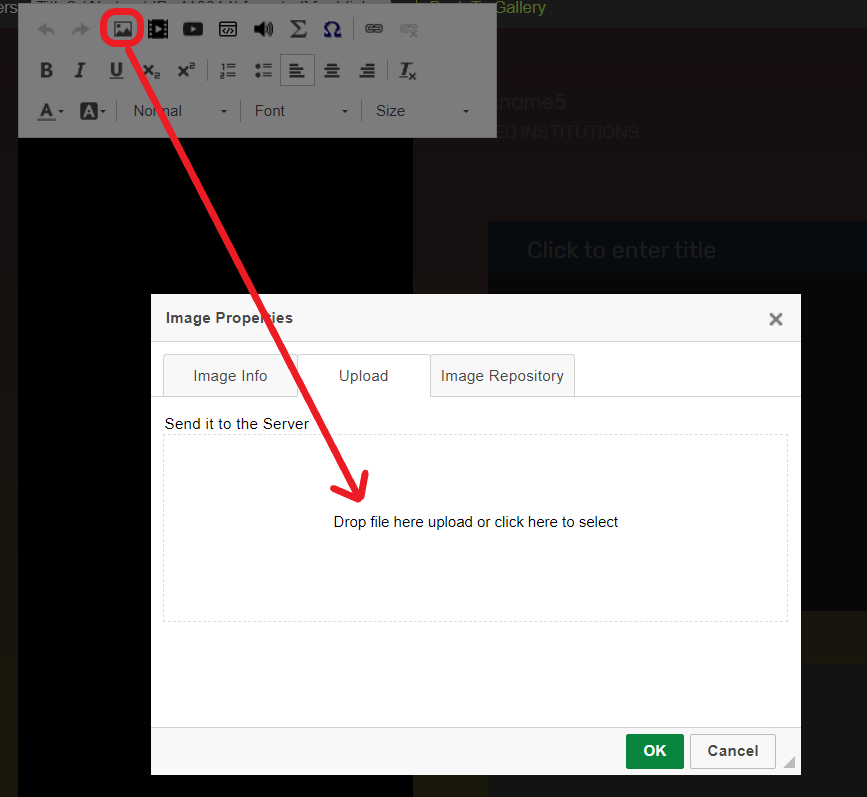
Iposter editor tool bar. The insert image tool is circled in red and a red arrow points down to an open dialogue box with the words ' Drop file here to upload or click here to select.'

2. After dropping or selecting your image file allow approx. 10 seconds for it to upload. The Image Info tab will be displayed. You can choose to add captions or alternative text to your image or change the alignment using the options in this box. Click ‘Ok’.
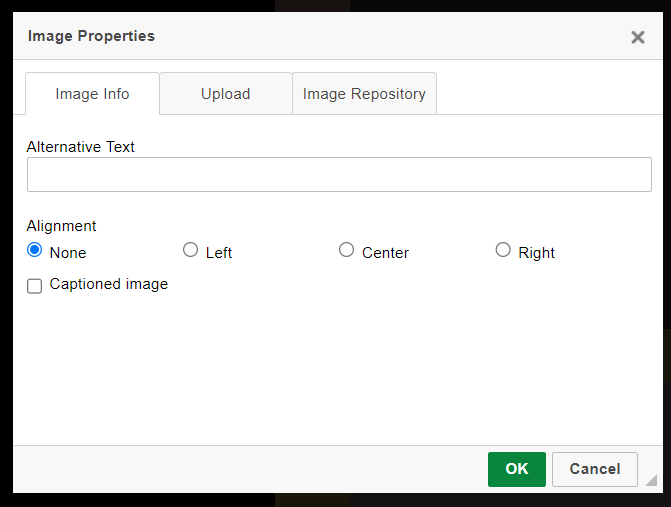
3. The image is now inserted into the content box. You can double click on the image to return to the Image Info tab and change/update any of the settings here.

Accessing uploaded images

All uploaded images will be stored in the Image Repository on the main menu. When you click on the insert image tool you may choose to upload the image (as in the process outlined above) or you can insert an image that has already been uploaded. Simply click on the Image Repository tab to view your stored images.
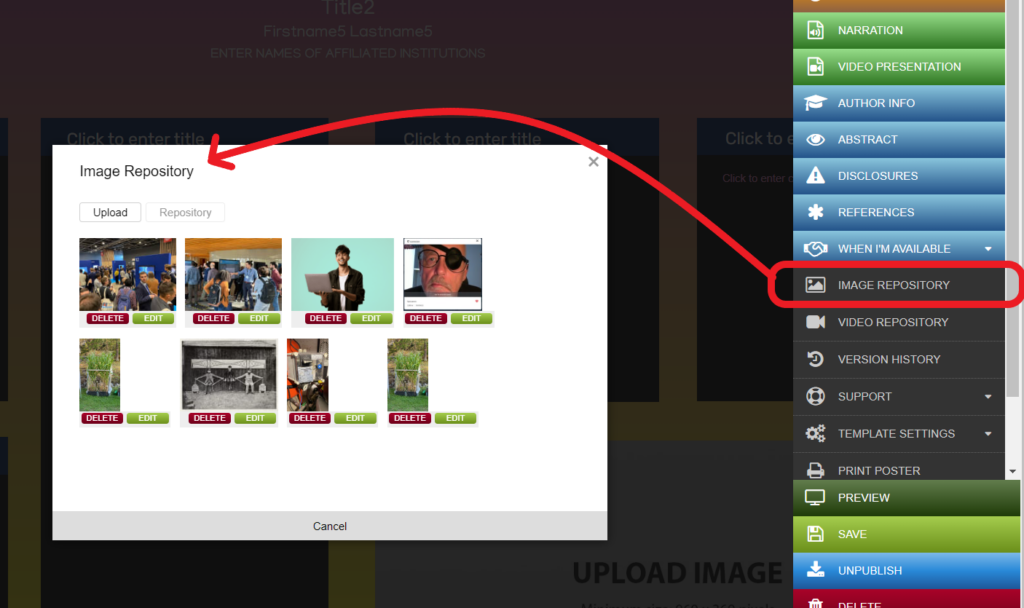
Image Repository button in the editor circled in red. A red arrow points at the opened dialogue box in the center of the screen which shows the images stored in the repository.

Editing images

Images can be edited to some degree within the iPoster system. From the Image Repository click on the green edit button under the relevant image. You can crop, re-size, rotate, or flip the image using the controls in the top menu. The below example shows the cropping tool. You can also zoom in or out on the image to make it easier to see the edits you’re making.
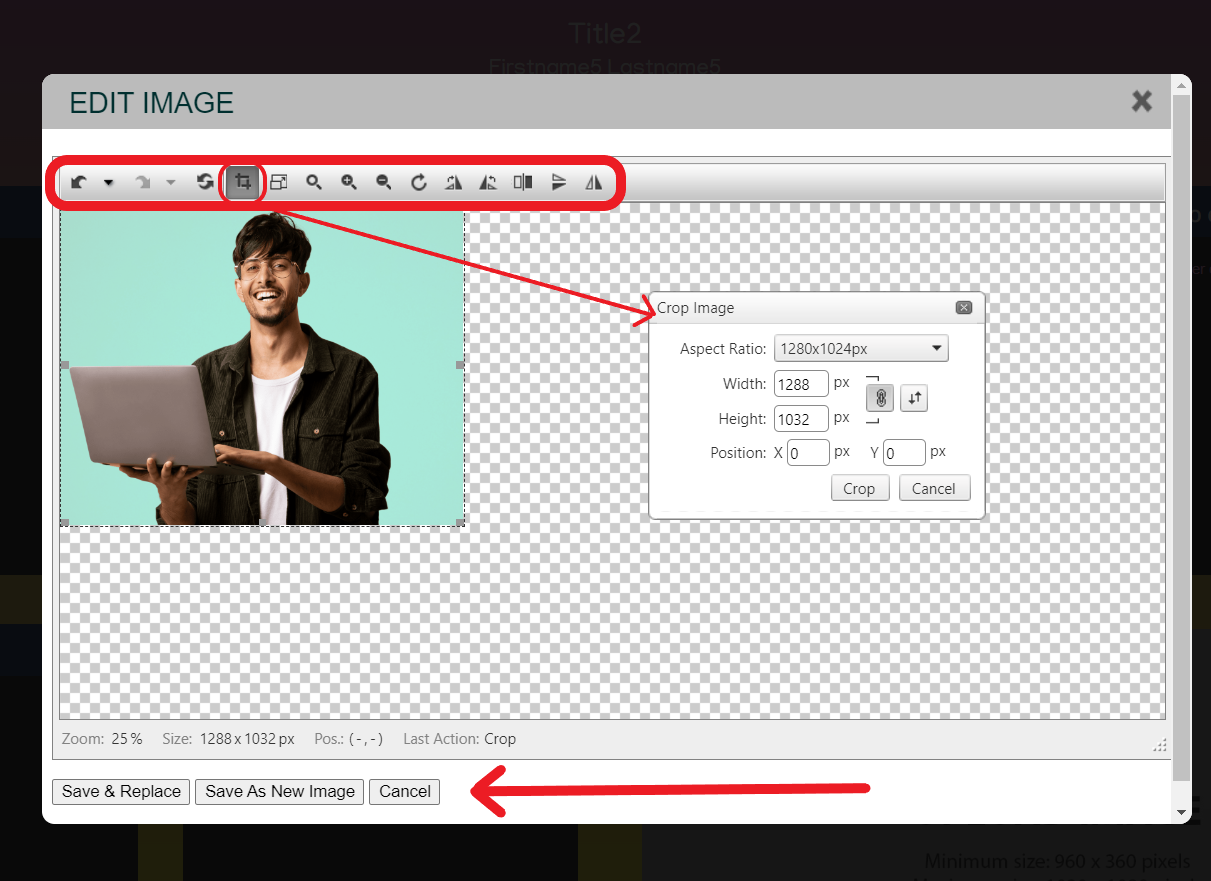
When you’ve completed your edits you can either save the edited image as a new image or replace the original image with the edited one.

Be sure to view our tutorials, which will give you a broad overview of the how to create your presentations.

Need further assistance? Reach out to our support team; send a support request or email us at [email protected]. Don’t forget to let us know which conference you’re creating a presentation for.

How to book an onsite screen

Book a time for your iPoster presentation using the built-in booking schedule. Please note that this tool is not available on all conferences. If it is enabled on your conference you can access the schedule under the ‘When I’m Available’ button on the main menu in your editor. Follow the guide below to see how it works.

1. Click on BOOK ONSITE SCREEN under the ‘When I’m Available’ button on the main menu.

The iPoster editor screen main menu. The option called 'BOOK ONSITE SCREEN' is circled in yellow.

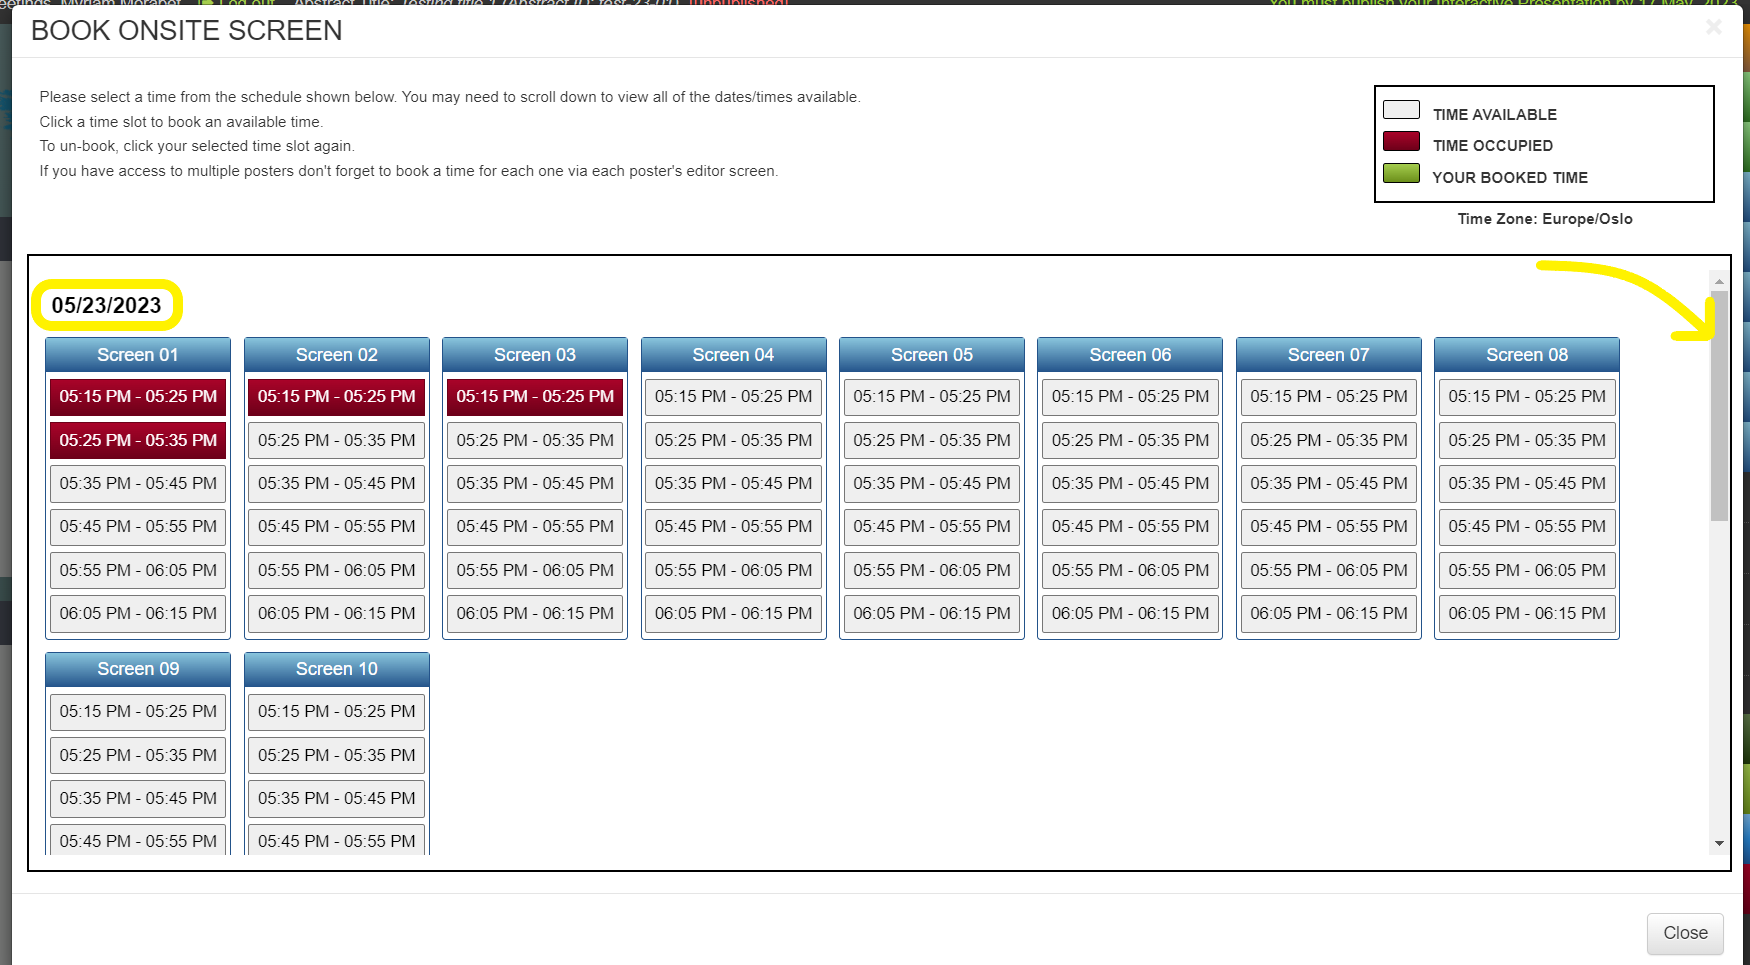
2. Here you will see the schedule of times/dates available to select from. Gray boxes are available times. Red boxes are unavailable times. The presentation date is shown above the screens. Don’t forget to scroll down to view the complete schedule.

An example of the booking schedule that opens when clicking on 'book onsite screen'. The time and dates are listed under each screen.  There is a brief description and a key which shows that RED= booked time slot. GREEN= your booked timeslot and GRAY= an available time slot.

There is a yellow outline around the schedule date at the top of the schedule and a yellow arrow pointing to the scroll bar

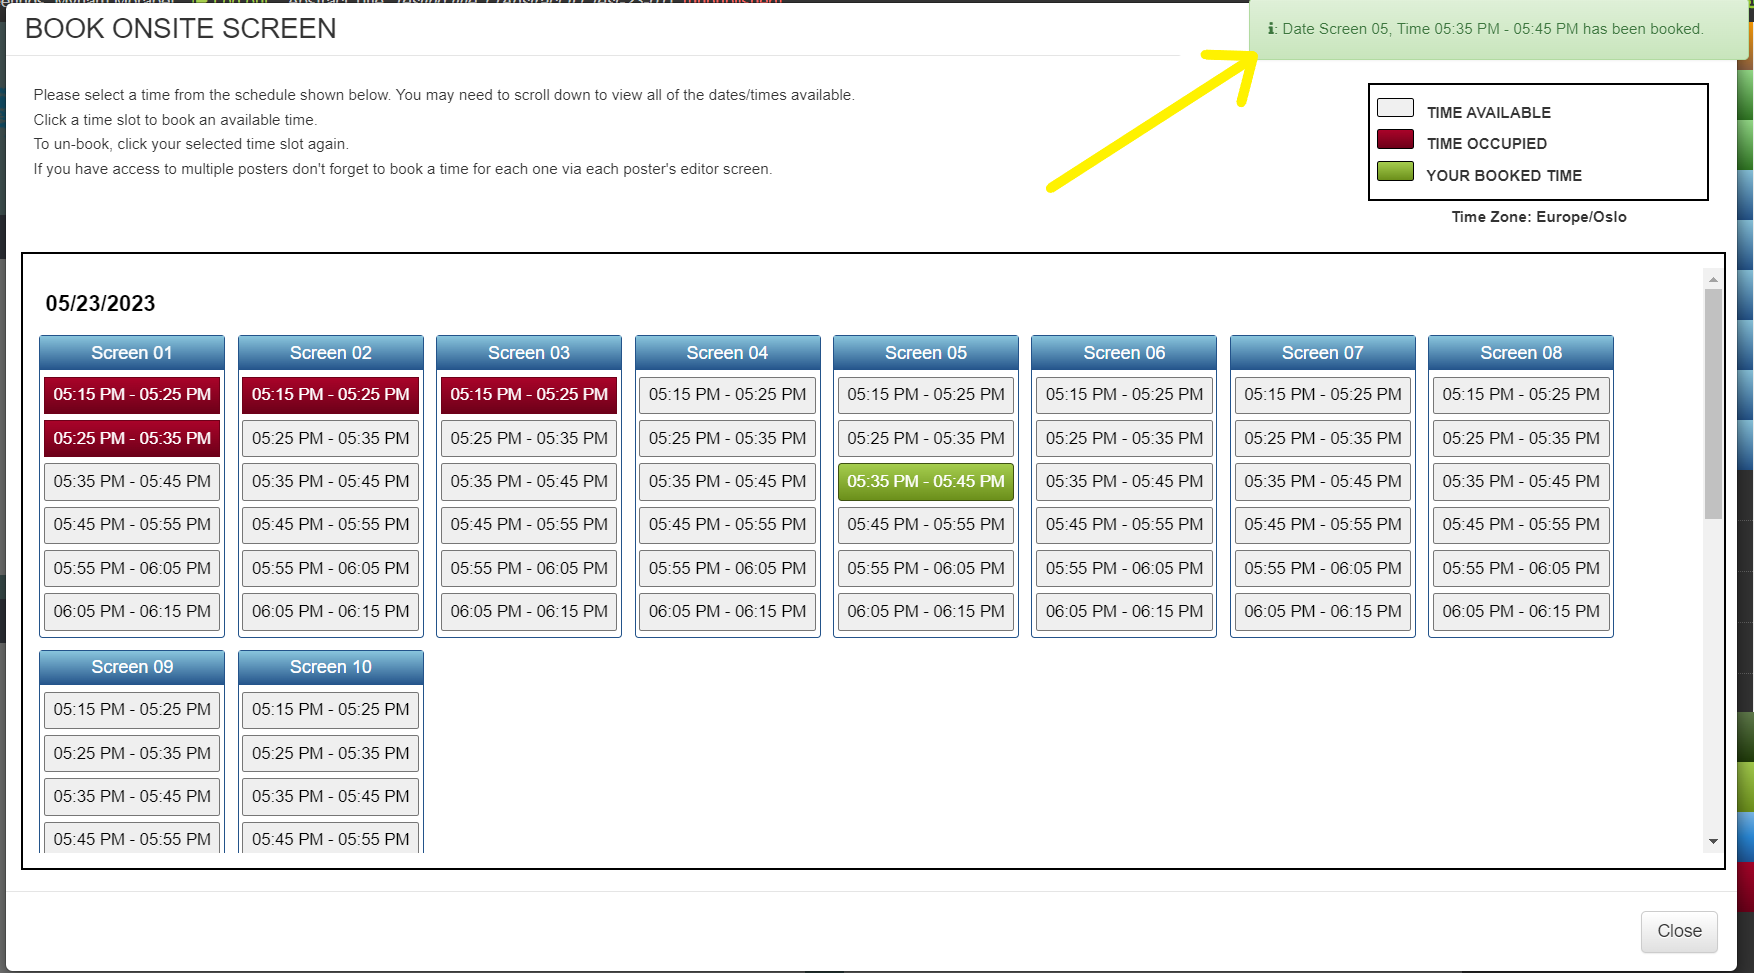
3. To book a time slot simply click on any available one that you want. When you have clicked on it you will see that it turns green and a green pop up message will show advising that you have booked this time.

The 'Book Schedule time' screen with a time slot selected in green. There is a yellow arrow pointing to a pop up notification advising that the selected time has been booked.

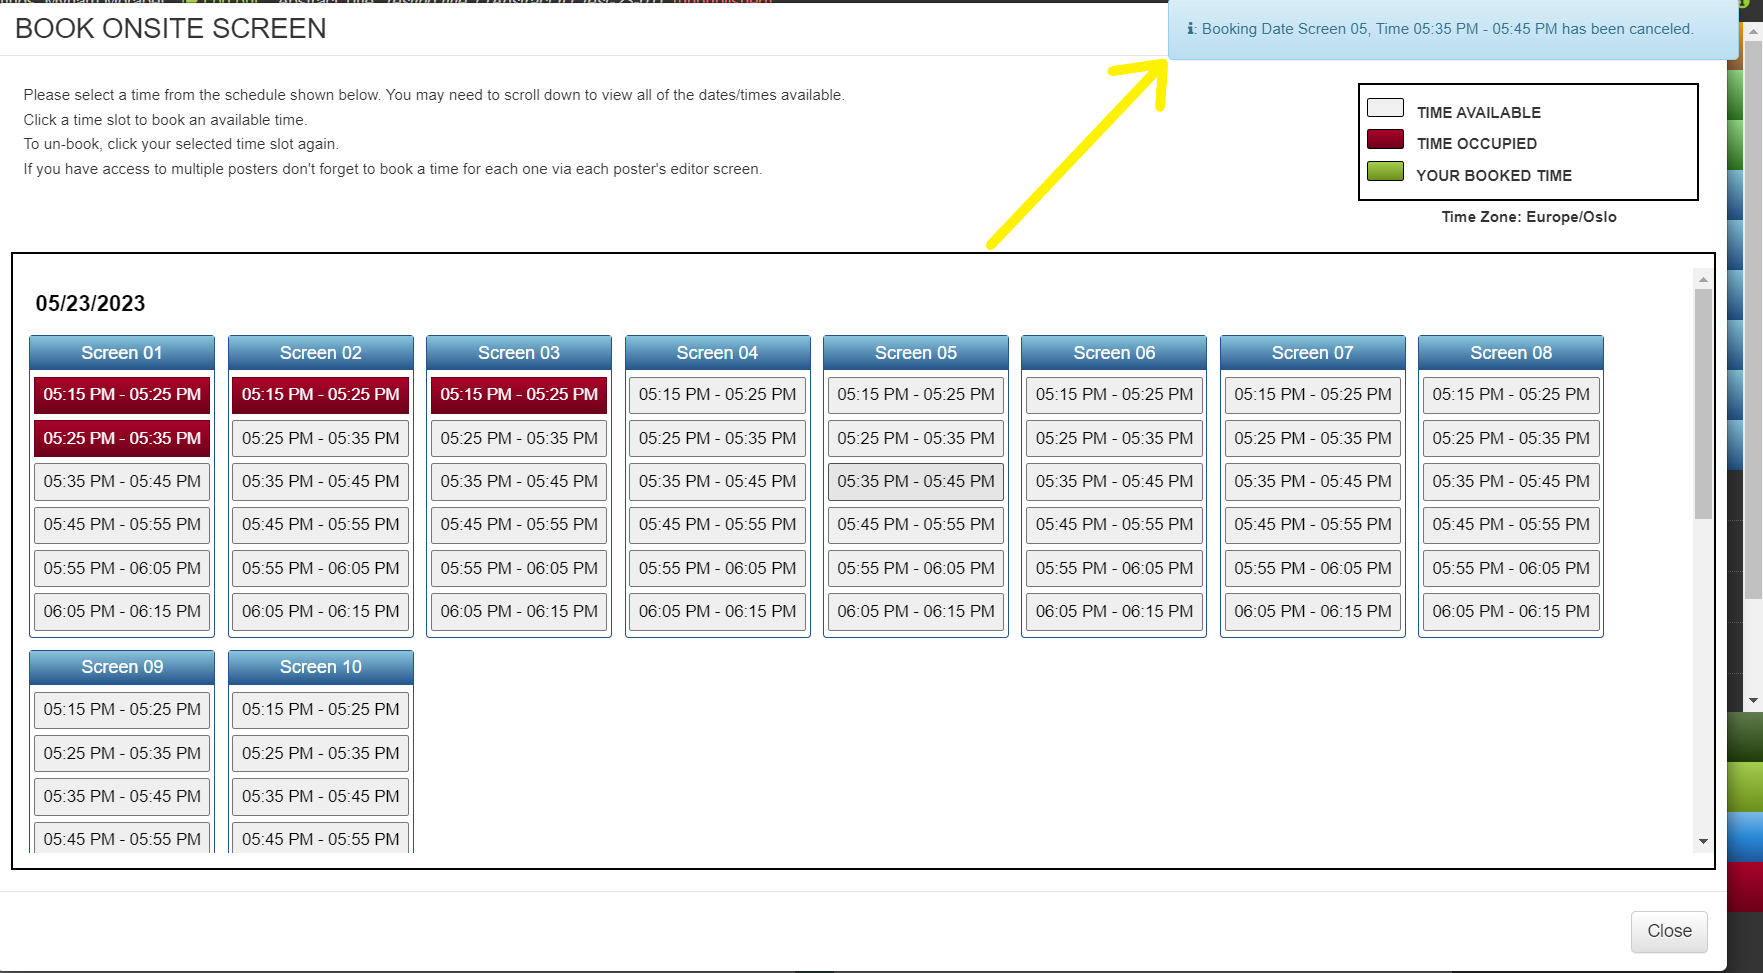
4. To un- book a time slot simply click on your selected booking. You will see a blue notification advising that your timeslot has been un-booked. And now you can select a different time.

The 'Book Schedule time' screen. There is a yellow arrow pointing to a pop up notification advising that the selected time has been un-booked.

5. If you have access to multiple posters don’t forget to book a time for each one. You must select a timeslot via each poster’s editor screen. Use the gray box at the top of your screen to toggle between your posters. You will see the booked times for each of your posters show up as green in the schedule, but you can only edit the booking for the poster in the current editing screen.

The multiple poster dropdown option in the iPoster editor. It shows 3 posters to pick from with a red arrow pointing to the middle one.

Need further assistance? Reach out to our support team; send a support request or email us at [email protected]. Don’t forget to let us know which conference you’re creating a presentation for.
How to use ‘My Settings’

Use the MY SETTINGS button to manage and measure access to your iPoster presentation, both before and after your event.

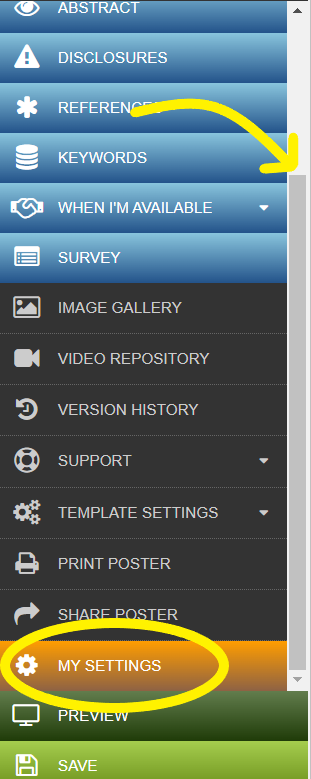
You will see the MY SETTINGS button on your Main Menu. You may need to scroll down in the menu to see it.

The Main Menu from the iPoster Editor. there is a yellow arrow pointing to the scroll bar and a yellow circle around the SETTINGS tab.

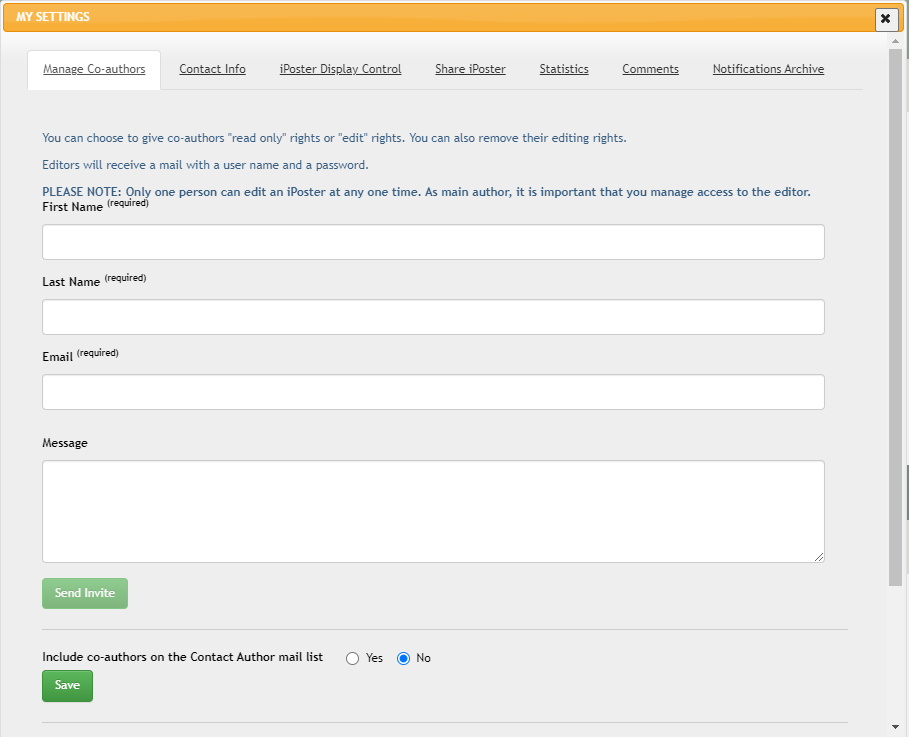
There are a number of tabs available with different settings. Here is an overall look at each of these tabs.

  • Manage Co-authors – Send an invitation to your co-authors. They will receive an email with their own unique credentials and editing access. For view only access copy and send the link from the ‘SHARE POSTER’ button. See this FAQ for detailed instructions on how to add a co-author to your poster.
  • Contact Info – Change your contact email address
  • iPoster Display Control – Choose whether your iPoster is visible in the conference’s online gallery after publishing.
  • Share iPoster – Choose whether to allow meeting attendees or online visitors to get a link to your iPoster
  • Statistics – View the following statistics on you iPoster:
    • how many views online
    • who has requested a share
    • who has requested contact
  • Comments – Update your preferences for public commenting on your poster. You can also read, respond to, or delete any comments here.
  • Notifications Archive – An archive for any pop-up notifications. I.e. planned site maintenance
A pop up option box showing the settings under the MY SETTINGS button in the iPoster editor. The first tab is the 'Manage Co-authors' tab.

Need further assistance? Reach out to our support team; send a support request or email us at [email protected]. Don’t forget to let us know which conference you’re creating a presentation for.
How can I revert back to a previously saved version of my iPoster?

To revert back to a previously saved version of your iPoster click on the VERSION HISTORY button in the Main Menu of your editor screen.

screenshot showing the version history button from the iPoster editor

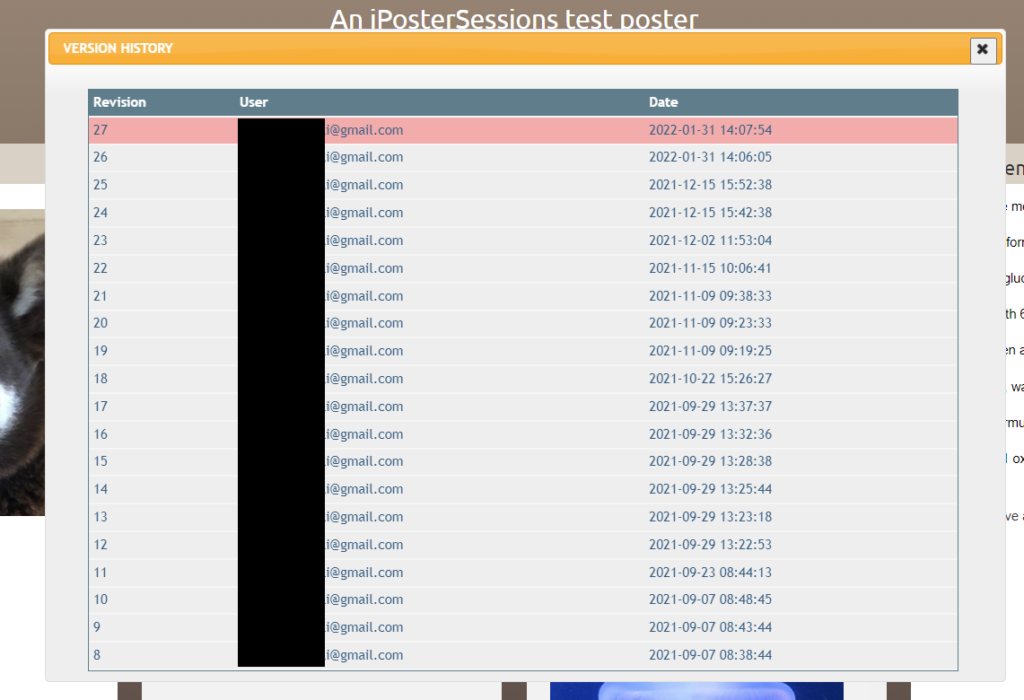
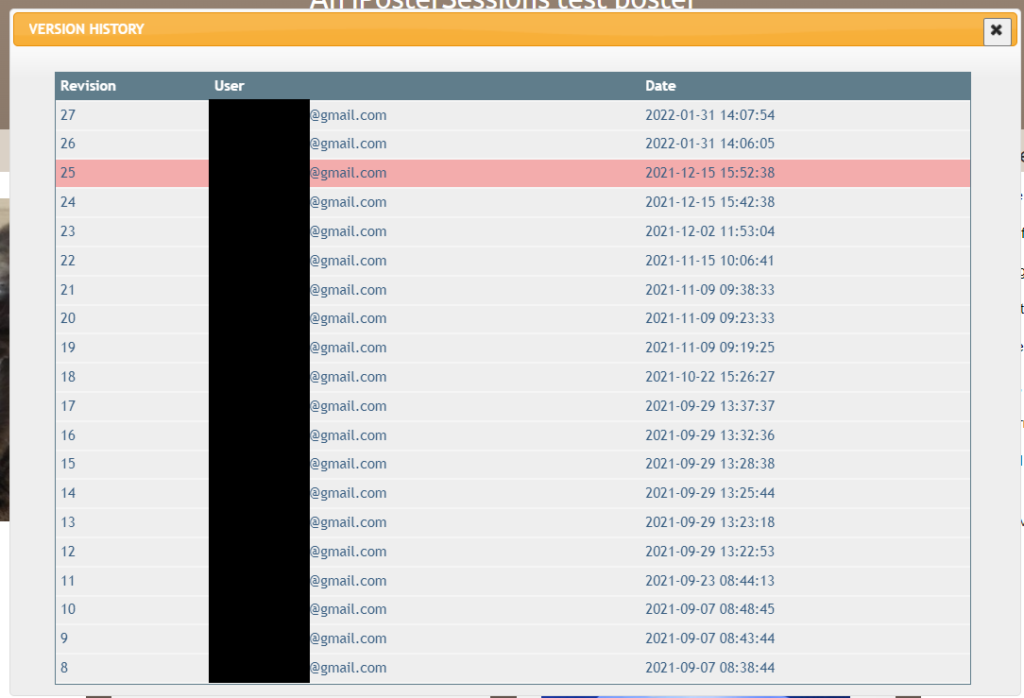
The last 20 versions of your iPoster will be visible (or up to 20 if you have less than that). The current version will be highlighted. e.g. this version is #27 from 31st Jan at 2:07 PM.

Screenshot of the iPoster version history

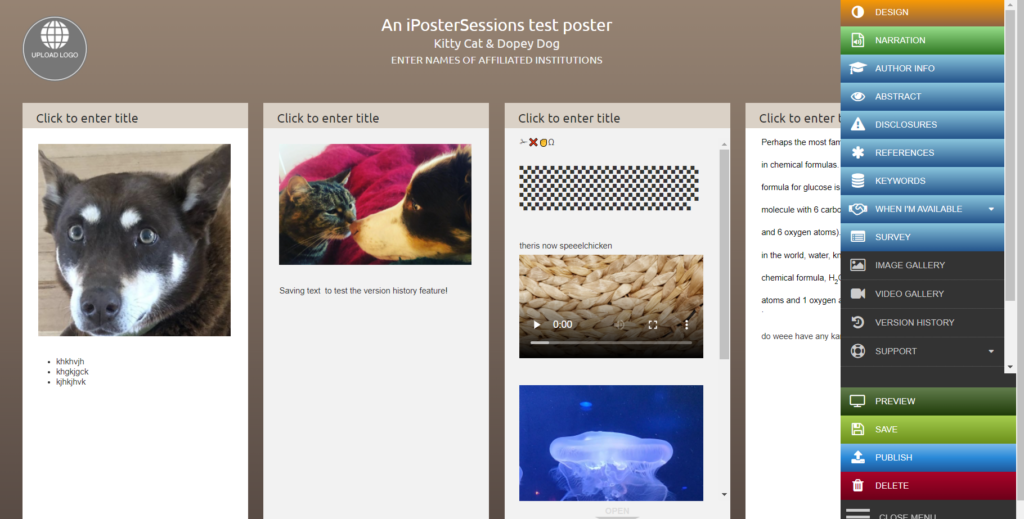
To load a previously saved version simply click on the one that you want. This version of your poster will be loaded.

Screenshot of an iPoster in progress in the iPoster Editor

You can check which version is currently loaded (the version that is currently showing), by clicking on the VERSION HISTORY button again. e.g. The active version is now #25 from 15th December at 3:52 PM.

Screenshot of the iPoster version history

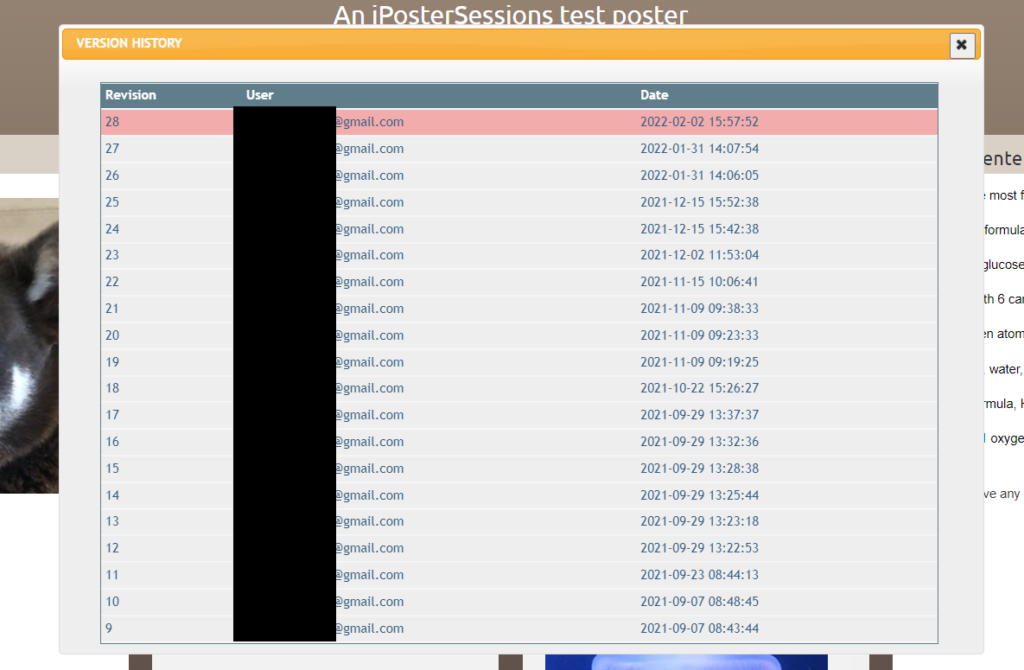
After making a change and saving the iPoster you will see a new version has been created (in this example #28). It is the active version that you are now in.

Screenshot of the version history in the iPoster editor

Need further assistance? Reach out to our support team; send a support request or email us at [email protected]. Don’t forget to let us know which conference you’re creating a presentation for.
How can I add a survey to my iPoster?

You can embed a link to a survey created on a platform like, Google Forms. Participants will see a button at the bottom of the poster which they can click on to complete the survey. Follow to the below steps to see how this link can be added to your presentation.

1. Choose a platform in which to create your survey. This example uses Google Forms, but you can use any platform that you prefer. Most of them offer a free basic survey creation tool and you will need to create an account with them to access this.

Here are some that we’ve tested and like:

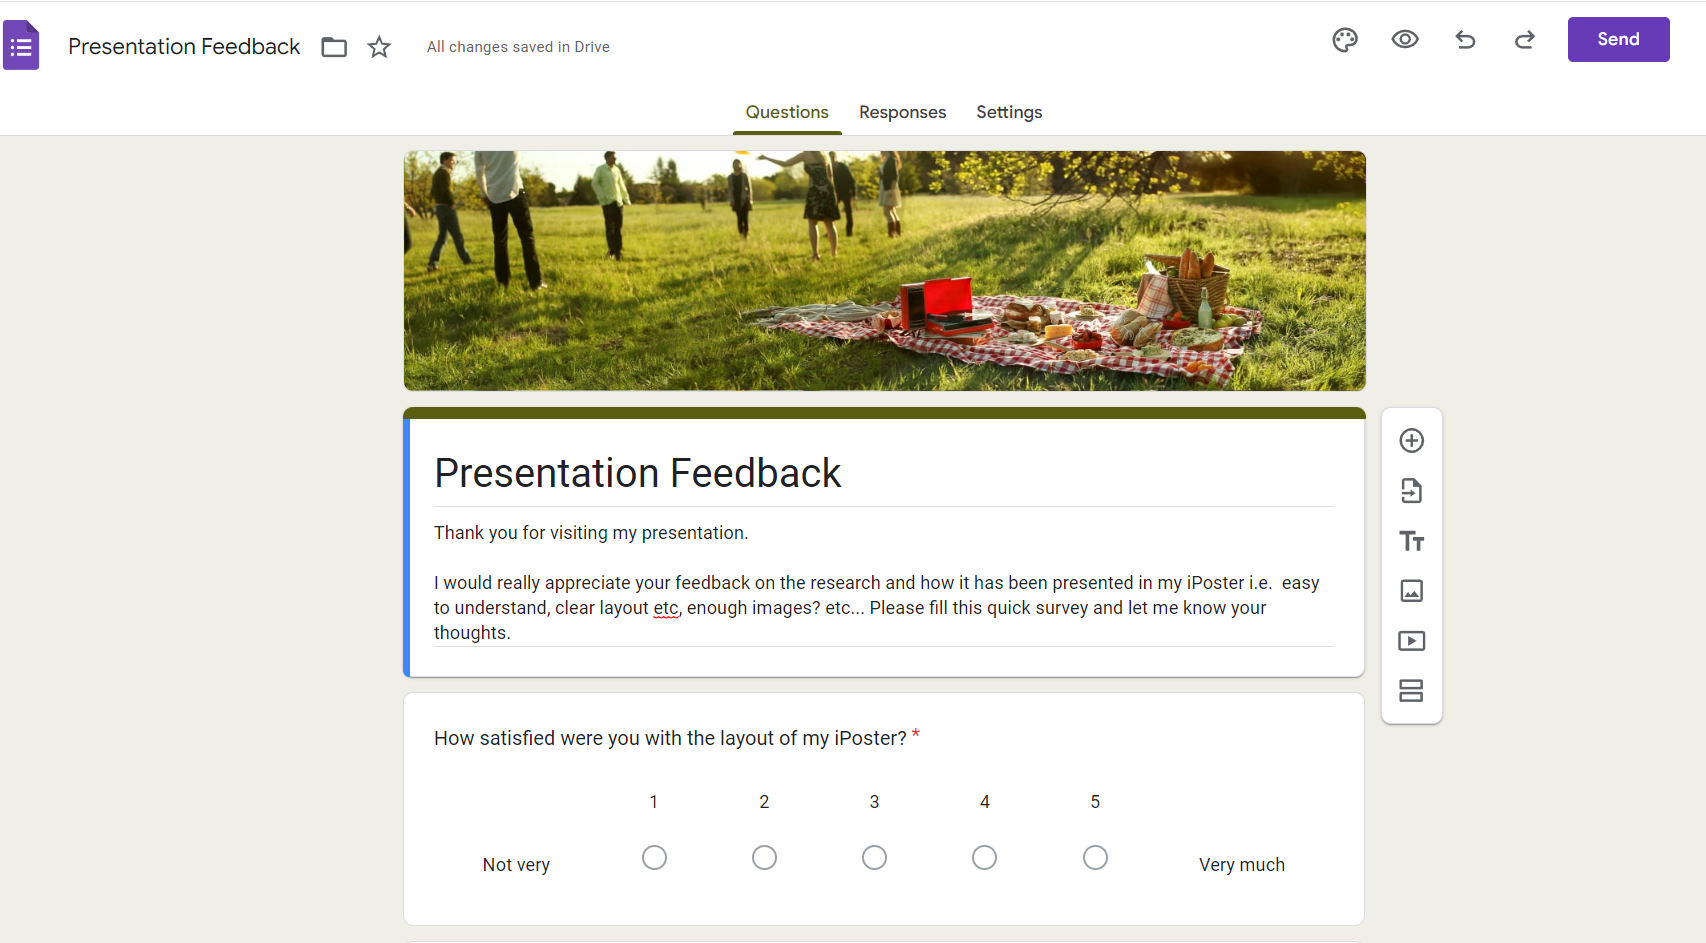
2. Create your questionnaire in your chosen platform. You can include as many or as few questions as you like.

Google forms survey example.

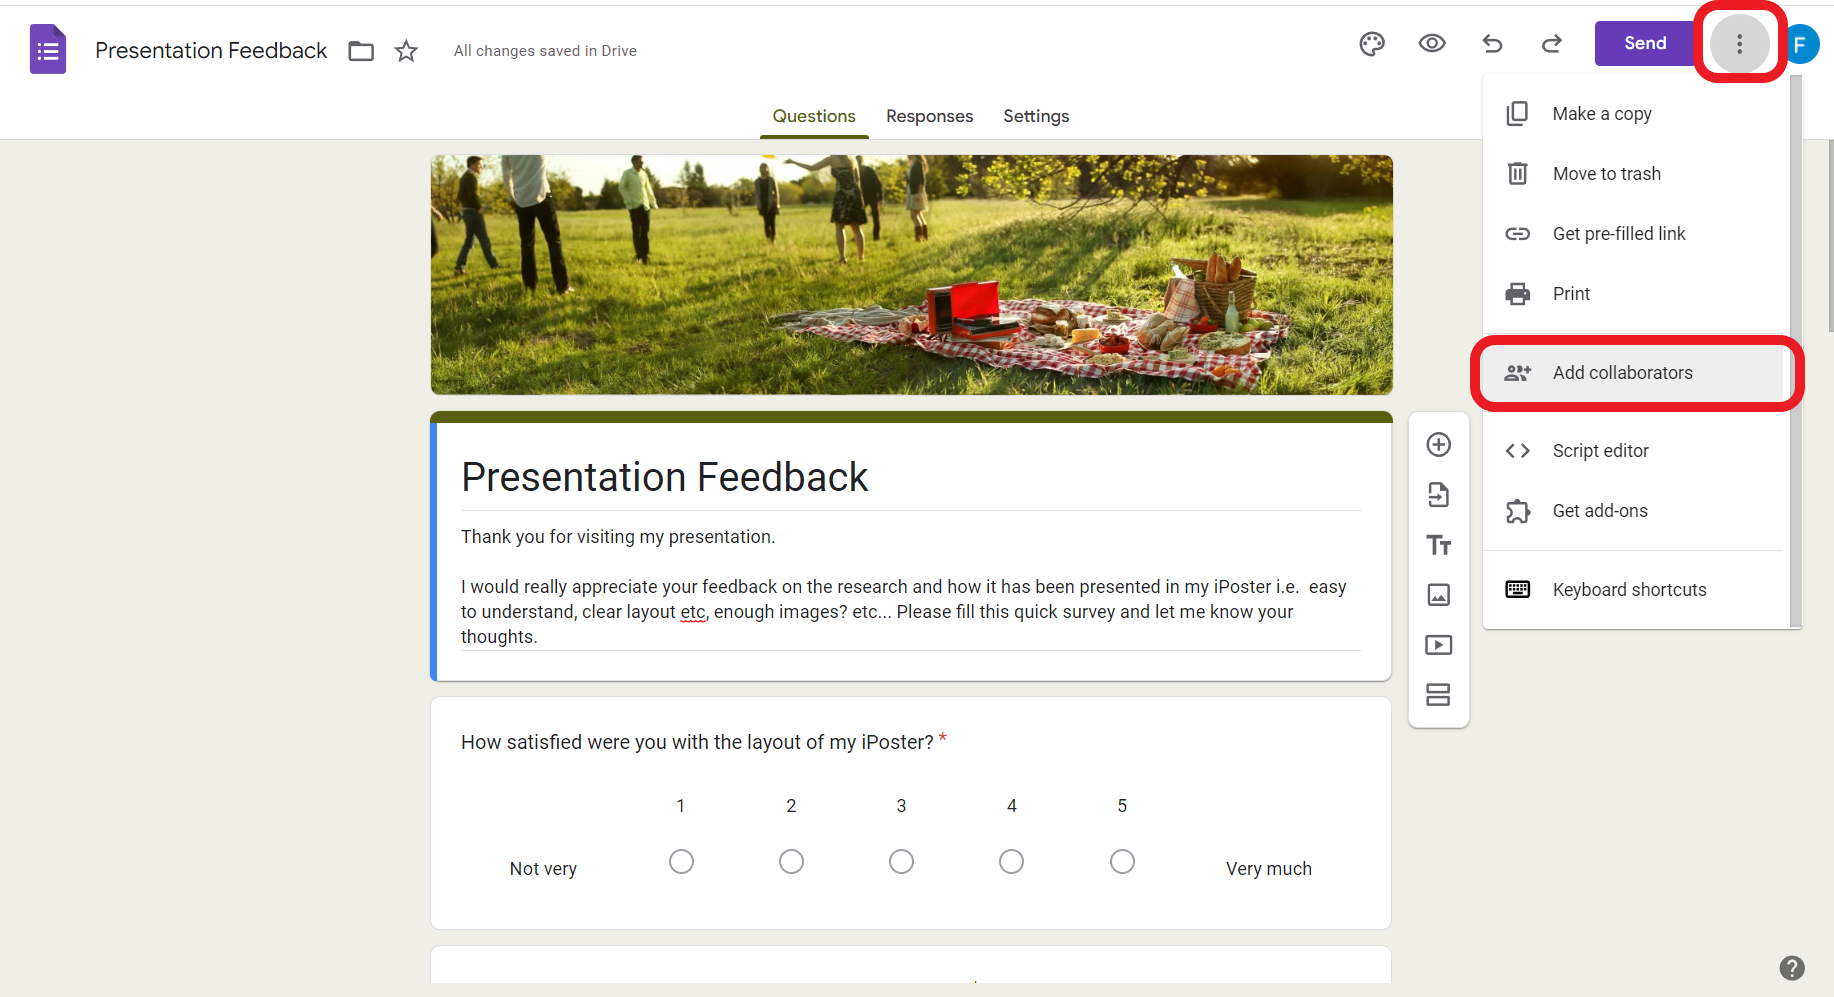
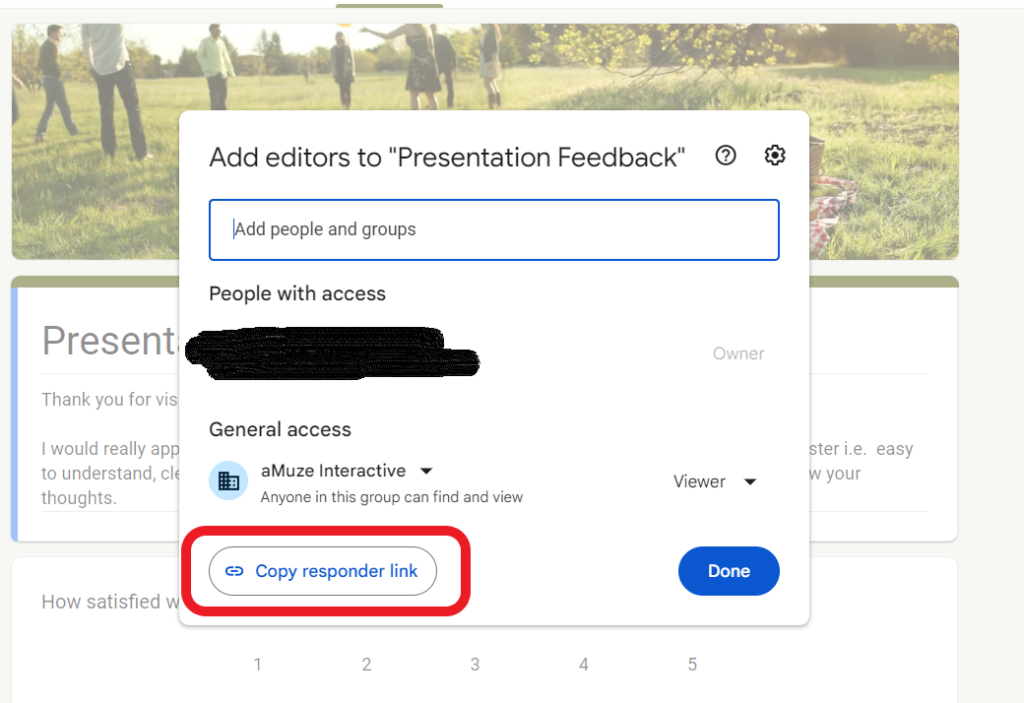
3. Copy the URL . To find the URL in Google Docs click on the 3 vertical dots at the top right of the screen>click on Add Collaborators>Click on ‘Copy Responder Link’ – the link is now copied.

Google forms survey example with the 3 dot menu circled in red. The menu options are displayed and the option 'Add collaborators' is circled in red.
The Google Forms dialog box pop up when 'Add Collaborators' is clicked. The option called 'Copy Responder Link' is circled in red.

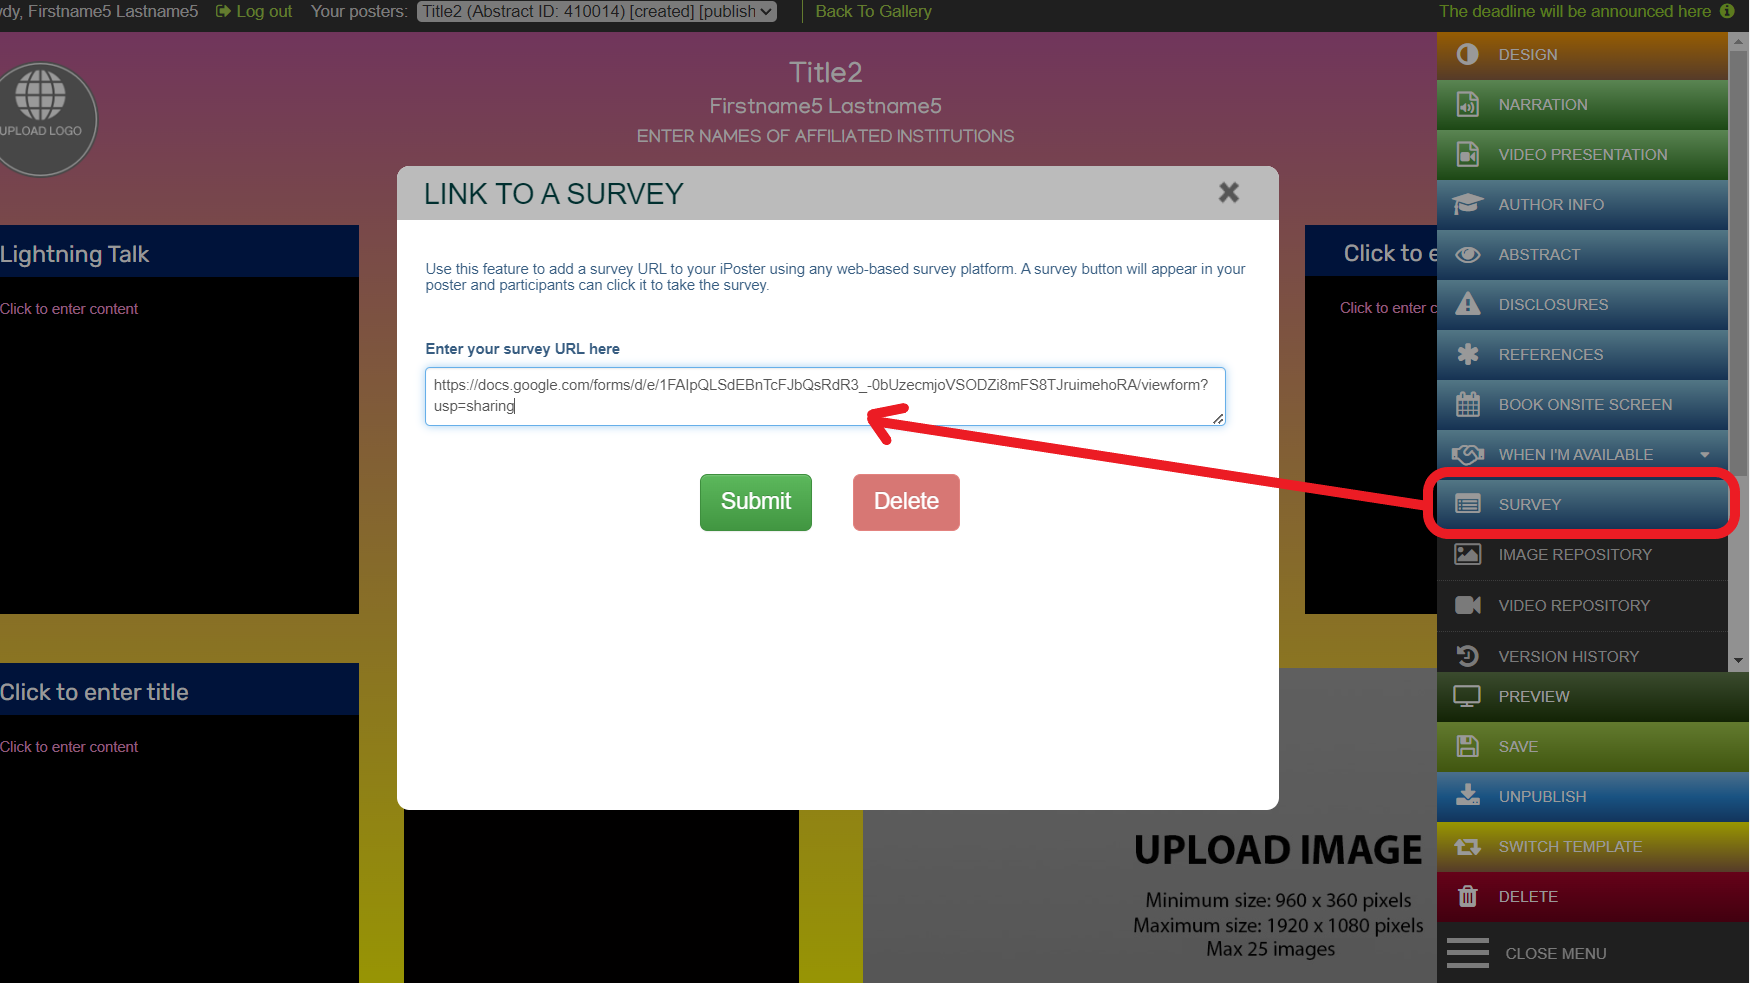
4. Login to the iPoster editor and click on the SURVEY button in the Main Menu. Paste your survey URL into the box and click ‘Submit’.

The iPoster editor screen. There is a red circle around the Add Survey link option and a red arrow pointing at the pop up box that opens when this is clicked. The survey link is pasted in this box.

5. Check that the button appears in Preview Mode. Close the dialogue box and click on the ‘Preview’ button.

The preview button from the iPoster editor.

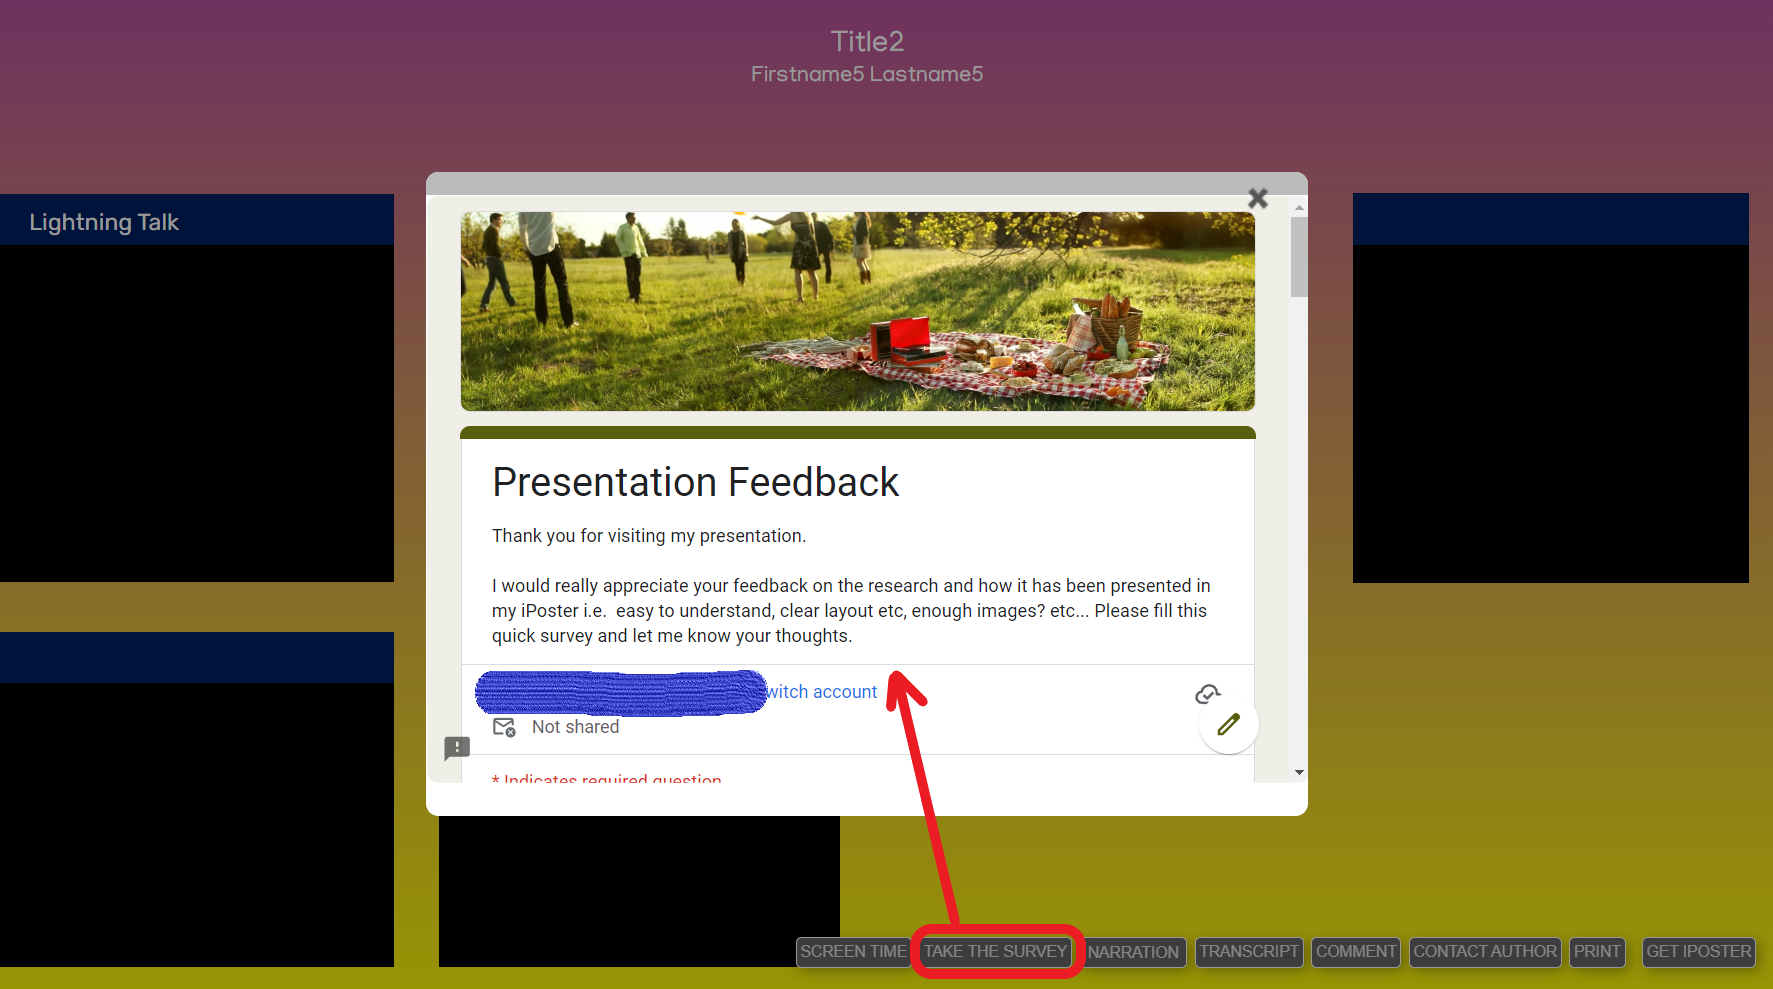
6. Click on the ‘Take the survey’ button. Check that it opens in the window and can be filled in as expected.

The iPoster preview page showing the Survey added opened and able to be filled in. The 'Take the survey' button is circled in red.

Need further assistance? Reach out to our support team; send a support request or email us at [email protected]. Don’t forget to let us know which conference you’re creating a presentation for.